
Choosing the right bolt size may look simple at first, but one small mistake can lead to weak connections, safety risks, or project failure. Whether you are working on a mechanical project, construction job, or DIY task, understanding how to read a bolt size chart is essential for accurate selection.
In this complete guide, you’ll learn everything step by step—from understanding bolt measurements to reading charts correctly—so you can confidently pick the right bolt every time.
Why Understanding Bolt Size Charts Matters
Before diving into bolt size charts, it’s essential to understand why they are so useful. These charts provide a quick reference for selecting the correct bolt for any project, ensuring proper fit, strength, and durability. Accurate chart reading prevents mistakes and improves efficiency in mechanical, automotive, and construction tasks.
A bolt size chart helps you:
- Select the correct bolt diameter and length
- Match threads accurately
- Ensure proper load-bearing capacity
- Avoid damage to materials
- Save time and cost on replacements
Using the wrong bolt can result in loose joints, stripped threads, or even structural failure. That’s why reading a bolt size chart correctly is a critical skill.
Basic Components of a Bolt Size
To read a bolt size chart effectively, you first need to understand the key components that define any bolt. Knowing these details allows you to choose the right bolt for specific applications, ensuring strength, compatibility, and safety in assembly or construction.
1. Bolt Diameter
The diameter is the thickness of the bolt shaft, often referred to as the shank. Accurate measurement is crucial to ensure proper fit with nuts or threaded holes. Diameters are listed in either imperial (inches) or metric (millimeters) to match the system used in your project.
- In inches (Imperial system)
- In millimeters (Metric system)
Example:
- 1/2″ bolt = half-inch diameter
- M10 bolt = 10 mm diameter
2. Thread Pitch
Thread pitch indicates how fine or coarse the threads are along the bolt shaft. Choosing the correct pitch ensures the bolt screws in properly and holds securely without stripping threads, which is vital for both safety and performance.
- Metric system: Distance between threads (in mm)
- Imperial system: Threads per inch (TPI)
Example:
- M10 × 1.5 → 1.5 mm between threads
- 1/4″-20 → 20 threads per inch
3. Bolt Length
Bolt length is another essential measurement. It determines how far the bolt extends through the components it joins, which directly affects clamping strength and stability. The method of measurement depends on the type of bolt head.
- Under the head (for most bolts)
- Entire length (for countersunk bolts)
4. Thread Type
Bolts come in various thread standards, which define the shape and spacing of the threads. Choosing the correct type ensures compatibility with nuts and prevents assembly issues, especially in precision or load-bearing applications.
- UNC (Unified National Coarse)
- UNF (Unified National Fine)
- Metric threads
5. Grade or Strength
Bolt charts also include strength ratings or grades, indicating how much load a bolt can handle. Selecting the appropriate grade is critical for safety, especially in structural or mechanical applications where failure could cause damage or injury.
- Grade 2, 5, 8 (Imperial)
- Class 8.8, 10.9, 12.9 (Metric)
Higher grade = stronger bolt.
Understand Bolt Size Chart Format
A bolt size chart is organized into rows and columns, with each column representing a specific measurement or property. Familiarity with the chart format allows you to quickly interpret dimensions, thread types, and application guidelines for accurate bolt selection.
Here’s what you will typically see:
Diameter | Thread Type | Pitch | Length | Torque | Application
1- Diameter Column
This column shows the bolt thickness, helping you match the bolt to the correct hole or nut size. Examples include:
- 1/4″, 3/8″, 1/2″
- M6, M8, M10
2- Thread Type Column
This column indicates the thread standard used for the bolt, guiding proper compatibility with corresponding nuts or tapped holes.
- Coarse (UNC)
- Fine (UNF)
- Metric
3- Pitch Column
The pitch column specifies the spacing between threads, ensuring bolts fit nuts without cross-threading.
- TPI for imperial bolts
- mm for metric bolts
4- Length Column
Shows the overall bolt length, usually from under the head or full length for countersunk bolts, which helps in selecting a bolt that reaches the required depth without being too long.
5- Torque Column
This column lists the recommended tightening force for the bolt, generally in Newton-meters (Nm) or foot-pounds (ft-lbs), to prevent over-tightening or loosening during use.
6- Application Column
This column provides guidance on where the bolt is commonly used, helping you choose bolts for specific machinery, automotive, or structural purposes. It’s a practical reference for everyday repair and assembly tasks.
Step-by-Step: How to Read a Bolt Size Chart
Reading a bolt size chart may seem complicated at first, but it becomes straightforward if you follow a step-by-step approach. Understanding each column, knowing the system, and checking thread pitch, length, and grade ensures you select the right bolt for your project safely and efficiently.
Step 1: Identify the System (Metric or Imperial)
The first step is to determine which measurement system the chart uses. Metric bolts are listed in millimeters (M6, M8, M10), while imperial bolts use inches (1/4″, 3/8″). Correctly identifying the system prevents mistakes, as mixing systems can lead to improper fits or damaged threads.
- Metric (M6, M8, M10)
- Imperial (1/4″, 3/8″, etc.)
This is important because both systems measure differently.
Step 2: Find the Diameter
The diameter is the bolt’s thickness and is usually listed in the first column of the chart. Selecting the correct diameter ensures the bolt fits the hole or nut perfectly. Always check both metric and imperial charts carefully to match your application.
Example:
- If your hole is 10 mm → choose M10
- If your hole is 0.5 inch → choose 1/2″
Step 3: Check Thread Pitch
Thread pitch determines how tightly the bolt will fit in the nut or tapped hole. Using the wrong pitch can damage threads or prevent proper fastening, which may lead to failures in mechanical or structural applications. Always match pitch accurately.
- Exact mm pitch (metric)
- Exact TPI (imperial)
This is very important because:
- Wrong pitch = bolt won’t fit
- Threads may get damaged
Step 4: Select the Length
Bolt length determines how far the bolt extends into the material and affects clamping strength. Proper selection ensures secure assembly without interference or insufficient grip. Measure material thickness and add a small allowance for the nut if needed.
Choose a bolt length based on:
- Material thickness
- Required grip length
Rule of thumb:
The bolt should extend slightly beyond the nut.
Step 5: Verify Thread Type
Thread type must match the corresponding nut or hole. Mixing coarse and fine threads or metric with imperial threads can lead to stripped threads, poor engagement, or structural failure. Always ensure compatibility before assembly.
- UNC with UNC
- UNF with UNF
- Metric with metric
Never mix thread systems.
Step 6: Check Strength Grade
Bolt grade indicates the material strength and load capacity. Using a bolt with insufficient grade may lead to deformation or failure under pressure. Always select a grade appropriate to the load and application to ensure durability and safety.
- Light-duty → lower grade
- Heavy-duty → higher grade
Step 7: Confirm Torque Values
Torque values guide how much force to apply when tightening a bolt. Over-tightening can strip threads or break the bolt, while under-tightening may result in loosening and unsafe assemblies. Checking torque ensures proper clamping without damaging components.
Over-tightening can:
- Strip threads
- Break the bolt
Under-tightening can:
- Cause loosening
Also Read:
Example of Reading a Bolt Size Chart
Understanding a real example makes bolt selection easier. A specification like M8 × 1.25 × 50 mm provides all key information at a glance. Knowing how to read each part ensures correct selection and prevents mistakes during assembly.
How to read it:
- M8 → 8 mm diameter
- 1.25 → thread pitch
- 50 mm → bolt length
This tells you everything needed for selection.
Metric vs Imperial Bolt Charts
Knowing both systems allows you to work on a wide range of projects without errors. Metric charts are in millimeters, while imperial charts use inches. Understanding the key differences avoids compatibility issues between parts and ensures proper assembly.
Metric Bolt Chart
- Diameter in mm
- Pitch in mm
- Example: M10 × 1.5
Imperial Bolt Chart
- Diameter in inches
- Threads per inch (TPI)
- Example: 1/4″-20
Key Difference
- Metric uses spacing between threads
- Imperial uses number of threads per inch
Common Mistakes When Reading Bolt Size Charts
Even professionals make mistakes when reading charts. Being aware of these pitfalls helps prevent loose fittings, thread damage, or structural failures. Always double-check measurements, thread type, grade, and torque before installation.
- Ignoring Thread Pitch: Many people only check diameter and length.
Result:: Bolt doesn’t fit properly
- Mixing Metric and Imperial: This is a very common error.
Example: Trying to fit M10 into 3/8″ hole
- Choosing Wrong Length: Too short: Weak connection
Too long: Interference issues
- Ignoring Bolt Grade: Using a low-grade bolt in high-load applications can be dangerous.
- Overlooking Torque Values: Improper tightening can damage the assembly.
Also Read:
Tips for Accurate Bolt Selection
Accuracy in bolt selection saves time and prevents assembly errors. Following simple habits and using proper tools ensures bolts fit securely, maintain strength, and avoid damage during installation.
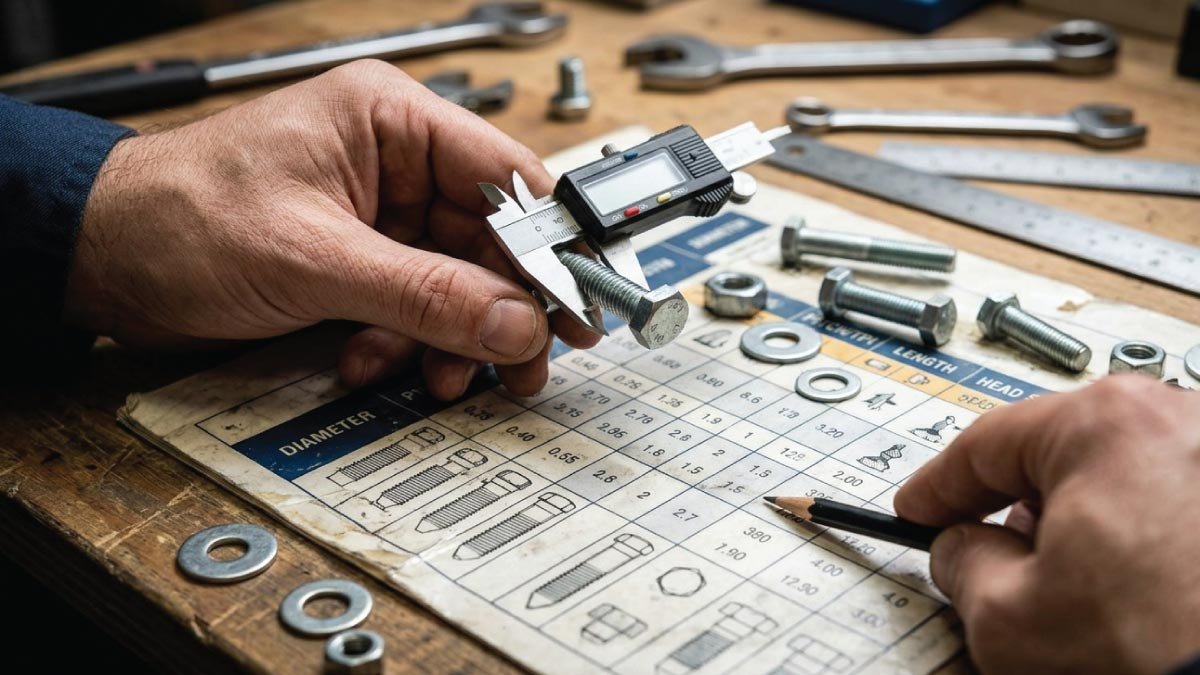
- Use a Caliper or Measuring Tool
Always measure:- Diameter
- Length
- Keep a Thread Gauge
This helps you identify thread pitch quickly. - Refer to Standard Charts
Use reliable bolt size charts instead of guessing. - Label and Organize Bolts
If you work frequently with bolts, keep them labeled. - Double-Check Before Installation
Always verify:- Size
- Thread
- Length
- Grade
Applications Where Bolt Size Charts Are Essential
Bolt size charts are essential across many industries. Using them correctly ensures strong, safe, and efficient assemblies in any mechanical, structural, or automotive task. They are also useful for DIY projects to maintain precision and reliability.
- Mechanical Engineering: For machines, engines, and equipment assembly.
- Construction Work: For structural connections and safety.
- Automotive Industry: For engine parts, suspension, and body assembly.
- DIY Projects: For furniture, home repairs, and custom builds.
How Bolt Size Affects Performance
Selecting the correct bolt size directly impacts performance and safety. Using the right diameter, thread pitch, grade, and length ensures bolts can bear loads, maintain stability, last longer, and prevent accidents. Proper bolt selection is critical in both professional and home projects.
- Strength: Larger diameter bolts تحمل more load.
- Stability: Correct thread pitch ensures tight fit.
- Durability: Proper grade prevents failure under stress.
- Safety: Accurate selection reduces risk of accidents.
Final Thoughts
Learning how to read a bolt size chart is a fundamental skill for anyone working with fasteners. It not only improves accuracy but also ensures safety, efficiency, and long-lasting results.
Instead of guessing, always rely on a proper chart and follow a step-by-step approach. With practice, reading bolt charts becomes quick and easy, helping you make the right selection every time.
Also Read:
FAQs:
How do you read bolt sizes?
To read bolt sizes, first identify the measurement system: metric or imperial. Check the diameter across the outer threads, measure the length from under the head (or full length for countersunk bolts), and determine the thread pitch. Use a caliper for accuracy and refer to bolt size charts for confirmation.
What does M8, M10, M12 mean?
M8, M10, and M12 are metric bolt designations. “M” indicates the bolt is metric, and the number refers to the nominal diameter of the bolt in millimeters. For example, M8 has an 8 mm diameter, M10 is 10 mm, and M12 is 12 mm. Thread pitch and length are separate specifications.
What is the meaning of M10 1.0 × 20?
M10 × 1.0 × 20 is a metric bolt specification. M10 means 10 mm diameter, 1.0 indicates the thread pitch in millimeters, and 20 is the bolt length from under the head to the tip. This specification ensures correct fit, load capacity, and compatibility with nuts or threaded holes.
What does M8 × 20 screw mean?
An M8 × 20 screw is a metric screw with an 8 mm diameter and 20 mm length measured from under the head. “M” indicates metric threads. The screw’s thread pitch is standard unless otherwise specified. This size is commonly used for moderate load applications in machinery and furniture assembly.
What does M8x1.25 bolt mean?
An M8 × 1.25 bolt is a metric bolt with an 8 mm diameter and a thread pitch of 1.25 mm. The pitch measures the distance between threads. Length is not included in this specification but may be added, such as M8 × 1.25 × 20 mm, to indicate bolt shaft length.
Is a M10 bolt 10 mm?
Yes, an M10 bolt has a nominal diameter of 10 mm. This is the outer width of the threaded shaft. The thread pitch and length are separate measurements. The M10 designation ensures compatibility with corresponding metric nuts, washers, and threaded holes for secure and proper assembly.