
Choosing the right bolt size might seem simple at first, but if you’ve ever worked on a mechanical project, you already know how critical it is. A bolt that’s too small can fail under load, while one that’s too large might not fit properly or could damage the material.
I have personally seen projects fail just because of the wrong bolt selection. Whether you’re working on machinery, automotive parts, or even a DIY home project, understanding bolt sizing can save you time, money, and frustration.
In this complete guide, you’ll learn how to choose the right bolt size step by step, along with a helpful bolt size chart to make your work easier.
Why Choosing the Right Bolt Size Matters
Before diving into charts and measurement methods, it’s essential to understand why selecting the correct bolt size matters so much in real-world applications. Bolts are not just simple fasteners—they are critical components that ensure structural stability, safety, and long-term performance in mechanical assemblies, construction, and machinery.
Bolts are designed to handle specific loads and stresses. When you use the wrong size:
- The joint may loosen over time
- The bolt may shear or break
- Threads can strip
- The entire structure can fail
In mechanical engineering, even a small miscalculation can lead to serious issues such as equipment failure, costly repairs, or safety hazards. That’s why professionals strictly follow standardized bolt sizing systems to ensure reliability, durability, and optimal performance in every application.
Understanding Bolt Size Basics
Bolt size is not defined by a single measurement; instead, it is a combination of several key parameters that work together to determine how a bolt fits and performs in a given application. Understanding these elements helps you choose the right bolt with confidence.
1. Bolt Diameter
The bolt diameter refers to the thickness of the bolt shaft, also known as the shank. It is one of the most important dimensions because it directly affects the strength and load-carrying capacity of the bolt in any mechanical or structural connection.
Example:
M8 bolt → 8 mm diameter
1/4″ bolt → 0.25 inch diameter
2. Thread Pitch
Thread pitch is the distance between adjacent threads on a bolt. It plays a key role in how tightly the bolt fits and how well it resists loosening under vibration or dynamic loads, making it crucial for precision and durability.
Metric bolts → measured in millimeters
Imperial bolts → measured in threads per inch (TPI)
Example:
M8 × 1.25 → 1.25 mm thread spacing
3. Bolt Length
Bolt length is measured from under the head to the tip of the bolt, and it determines how deep the bolt will go into the material. Choosing the correct length ensures proper grip and prevents weak or unsafe connections.
Important tip:
For countersunk bolts, length includes the head. For others, it doesn’t.
4. Thread Type
Thread type refers to the design and spacing of the threads, which affects installation ease, strength, and resistance to vibration. Selecting the right type ensures better performance depending on the application and working conditions.
Coarse thread → stronger, easier to install
Fine thread → more precise, better for vibration resistance
Also Read:
Step-by-Step: How to Choose the Right Bolt Size
Let me walk you through a practical, real-world method you can follow every time you need to select the right bolt size. This step-by-step approach is based on common engineering practices and personal experience, helping you avoid costly mistakes and ensure strong, reliable connections.
Step 1: Identify the Application
The first step is always understanding where and how the bolt will be used. Different applications demand different strength levels, sizes, and materials, so defining the purpose early helps narrow down your options effectively.
Start by asking:
- Is this for heavy machinery?
- Automotive use?
- Furniture or DIY project?
Different applications require different bolt strengths and sizes.
For example:
Structural work → larger, high-strength bolts
Light fixtures → smaller bolts
Step 2: Determine Load Requirements
Load is one of the most critical factors when choosing a bolt because it directly affects safety and durability. You must understand the type and magnitude of forces the bolt will experience during operation.
There are two main types:
- Tensile load → pulling force
- Shear load → sideways force
If your bolt will handle heavy loads, choose a larger diameter and a higher-strength grade to prevent failure and ensure long-term reliability in demanding conditions.
Step 3: Select the Bolt Diameter
Choosing the correct diameter is essential because it determines how much load the bolt can safely carry. A thicker bolt generally provides greater strength, but it must also fit properly within the design constraints of your project.
As a general rule:
- Higher load → larger diameter
- Lower load → smaller diameter
Here’s a quick reference:
Application Type | Recommended Diameter
Light duty | M4 – M6
Medium duty | M8 – M12
Heavy duty | M16 and above
Step 4: Choose the Correct Length
Bolt length plays a crucial role in ensuring proper fastening and load distribution. A bolt that is too short won’t provide enough grip, while one that is too long may interfere with surrounding components or create instability.
Bolt length should allow:
- Full thread engagement
- Proper tightening
- No excessive protrusion
A good rule I personally follow:
👉 The bolt should extend at least 2–3 threads beyond the nut.
Step 5: Match Thread Type and Pitch
Selecting the correct thread type and pitch ensures compatibility with the nut and improves performance under specific conditions. It also helps prevent loosening, especially in environments with vibrations or repeated motion.
Use coarse threads when:
- Working with soft materials
- Quick installation is needed
Use fine threads when:
- Precision is required
- Vibration is present
Step 6: Check Material Compatibility
The material of the bolt must match the environment in which it will be used. This is especially important for preventing corrosion, maintaining strength, and ensuring long-term durability in different working conditions.
Bolt material must match the environment:
- Stainless steel → corrosion resistance
- Carbon steel → general use
- Alloy steel → high strength
For outdoor or wet environments, always choose corrosion-resistant bolts to avoid rust and premature failure.
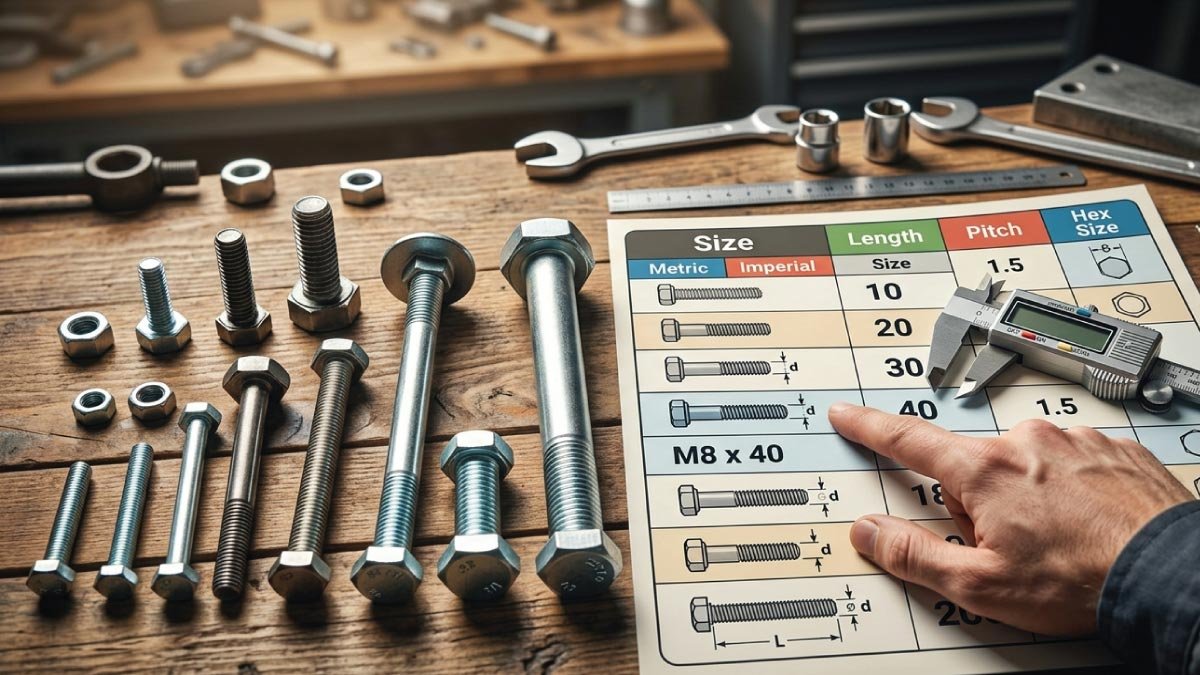
Bolt Size Chart (Metric)
Here’s a simple and practical metric bolt size chart you can use as a quick reference when selecting bolts for different applications. It helps you match diameter, pitch, and common usage scenarios efficiently.
| Bolt Size | Diameter (mm) | Standard Pitch | Common Uses |
|---|---|---|---|
| M4 | 4 mm | 0.7 mm | Electronics, small parts |
| M5 | 5 mm | 0.8 mm | Light machinery |
| M6 | 6 mm | 1.0 mm | Furniture, brackets |
| M8 | 8 mm | 1.25 mm | Automotive, machines |
| M10 | 10 mm | 1.5 mm | Structural joints |
| M12 | 12 mm | 1.75 mm | Heavy-duty applications |
| M16 | 16 mm | 2.0 mm | Industrial equipment |
| M20 | 20 mm | 2.5 mm | Large structures |
Bolt Size Chart (Imperial)
If you’re working with inch-based systems, this imperial bolt size chart will help you understand diameter, thread count, and typical applications used in industries like automotive and machinery.
| Bolt Size | Diameter (inch) | Threads Per Inch | Common Uses |
|---|---|---|---|
| #10 | 0.19″ | 24 TPI | Light fixtures |
| 1/4″ | 0.25″ | 20 TPI | General use |
| 5/16″ | 0.31″ | 18 TPI | Automotive |
| 3/8″ | 0.375″ | 16 TPI | Machinery |
| 1/2″ | 0.5″ | 13 TPI | Heavy-duty |
| 3/4″ | 0.75″ | 10 TPI | Structural work |
Also Read:
How to Measure Bolt Size Correctly
If you already have a bolt and want to identify its exact size, following a proper measurement method is essential. Accurate measurements ensure compatibility with nuts, threaded holes, and overall assembly requirements.
Tools You Need:
- Vernier caliper (best option)
- Ruler (for basic measurement)
Steps:
- Measure the diameter of the shaft
- Measure the length from under the head
- Count threads or measure pitch
I always recommend using a caliper because it provides precise and reliable measurements, especially when working on mechanical or engineering projects where even small errors can cause fitting issues.
Common Mistakes to Avoid
Over the years, I’ve seen people repeatedly make the same bolt selection mistakes, which often lead to weak connections or mechanical failures. Avoiding these common errors can save time, money, and effort.
1. Ignoring Load Requirements
Many people underestimate the importance of load capacity and end up choosing bolts that are too small or weak. This can result in bending, breaking, or complete joint failure under stress. Always match the bolt size with the expected load.
2. Wrong Thread Type
Using mismatched thread types, such as mixing metric and imperial bolts, can damage both the bolt and nut. This not only weakens the connection but can also make disassembly difficult or impossible in the future.
3. Choosing Incorrect Length
Selecting the wrong bolt length is a very common issue.
- Too short → weak connection
- Too long → interference with other parts
Always ensure the bolt length provides proper engagement without causing obstruction.
4. Not Considering Environment
Environmental factors are often ignored, but they play a major role in bolt performance. Using standard steel bolts in outdoor or wet conditions can lead to rust, corrosion, and eventual failure, reducing the lifespan of your assembly.