
Installing a head gasket involves removing the old gasket, cleaning surfaces, positioning the new gasket, torquing the cylinder head bolts properly, reassembling components, and testing the engine to ensure a proper seal and optimal performance.
Head Gasket Installation is a critical task that demands precision and attention to detail. A properly installed head gasket ensures optimal engine performance and prevents potential issues such as leaks and overheating. In this comprehensive guide, we outline seven easy steps to achieve a perfect fit for your head gasket installation.
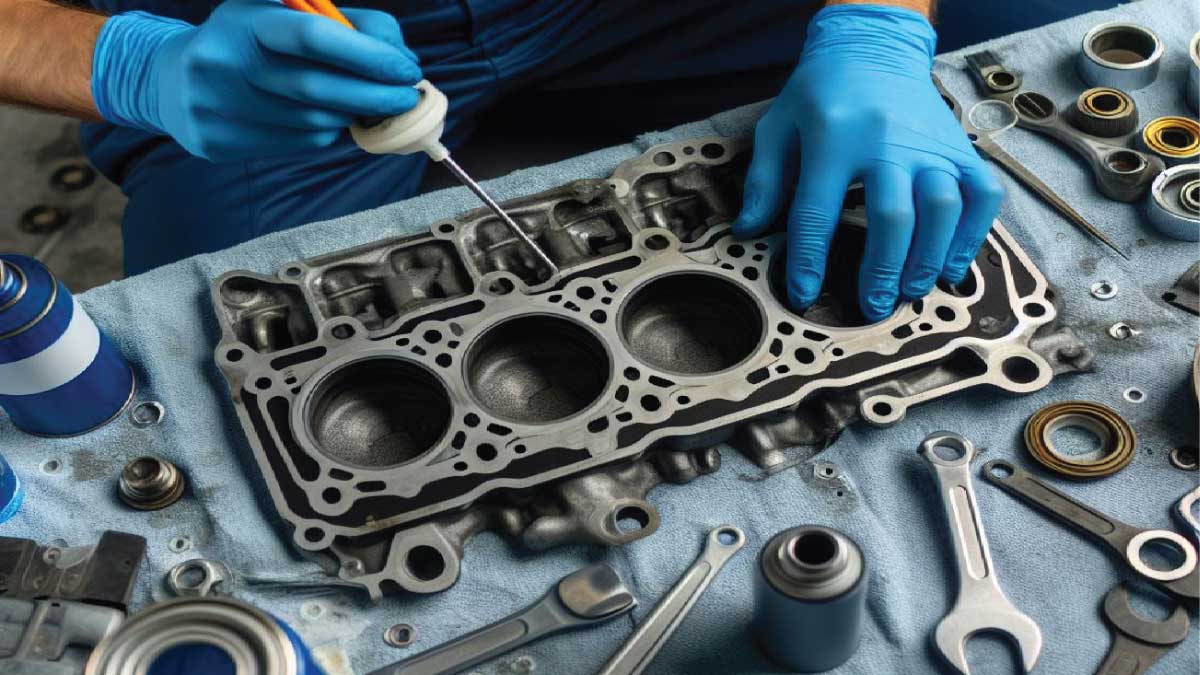
Understanding the Role of a Head Gasket
Before diving into the installation process, it is essential to understand the head gasket’s role in your engine. The head gasket is a vital component that seals the engine block and cylinder head, ensuring that the combustion process remains contained. It prevents the mixing of coolant and oil while maintaining the engine’s compression. A well-installed head gasket is crucial for engine efficiency and longevity.
Tools and Materials Needed
To begin the head gasket installation, gather the following tools and materials:
- Head gasket kit
- Socket set and wrenches
- Torque wrench
- Screwdrivers
- Gasket scraper or razor blade
- Engine cleaner
- Clean cloths
- Engine assembly lubricant
- Sealant (if recommended by the manufacturer)
- Service manual for your specific vehicle
Having all the necessary tools and materials on hand will streamline the installation process and ensure accuracy.
Step 1: Prepare the Engine
Start by preparing the engine for head gasket installation:
- Disconnect the Battery: Ensure safety by disconnecting the battery to avoid any electrical issues.
- Drain Fluids: Drain the engine coolant and oil to prevent any spills during the installation.
- Remove Components: Carefully remove the components obstructing access to the head gasket, including the intake manifold, exhaust manifold, and any hoses or wiring.
Step 2: Clean the Surfaces
Proper surface preparation is key to a successful head gasket installation:
- Remove the Old Gasket: Use a gasket scraper or razor blade to remove the old head gasket material from the engine block and cylinder head surfaces.
- Clean the Surfaces: Thoroughly clean the mating surfaces with engine cleaner and a clean cloth. Ensure no debris, oil, or old gasket material remains.
- Inspect for Damage: Check the engine block and cylinder head for any signs of warping or damage. If damage is found, it may require professional machining.
Step 3: Position the New Head Gasket
Carefully position the new head gasket on the engine block:
- Align the Gasket: Ensure that the new head gasket is properly aligned with the engine block’s bolt holes and coolant passages.
- Avoid Contaminants: Handle the gasket with clean hands to avoid contaminating the sealing surfaces.
Step 4: Install the Cylinder Head
With the new head gasket in place, proceed to install the cylinder head:
- Position the Cylinder Head: Carefully lower the cylinder head onto the engine block, ensuring it aligns with the head gasket.
- Insert the Bolts: Hand-tighten the cylinder head bolts in the specified sequence recommended by the vehicle’s service manual.
Step 5: Torque the Bolts
Properly torquing the cylinder head bolts is crucial for an effective seal:
- Use a Torque Wrench: Follow the manufacturer’s specifications for the torque settings. Typically, bolts are torqued in multiple stages.
- Follow the Sequence: Tighten the bolts in the sequence specified in the service manual. This ensures even pressure distribution and prevents warping.
Step 6: Reassemble Components
With the cylinder head securely in place, reassemble the engine components:
- Reconnect Components: Reattach the intake manifold, exhaust manifold, hoses, and wiring that were removed earlier.
- Refill Fluids: Refill the engine with the appropriate coolant and oil, following the manufacturer’s specifications.
Step 7: Test the Engine
After reassembly, it is crucial to test the engine to ensure everything is functioning correctly:
- Reconnect the Battery: Reconnect the battery and start the engine.
- Check for Leaks: Inspect the engine for any signs of leaks or unusual noises.
- Monitor Engine Performance: Allow the engine to reach operating temperature and monitor its performance. Ensure there are no issues such as overheating or loss of compression.
Tips for a Successful Head Gasket Installation
- Use Quality Parts: Always use a high-quality head gasket and follow the manufacturer’s recommendations.
- Follow the Service Manual: Adhere strictly to the vehicle’s service manual instructions for torque settings and bolt tightening sequences.
- Inspect and Clean: Thoroughly inspect and clean all mating surfaces to ensure a proper seal.
- Take Your Time: Do not rush the installation process. Attention to detail is critical for a successful outcome.
Common Mistakes to Avoid
Avoiding common mistakes can ensure the longevity and performance of your head gasket:
- Skipping Surface Cleaning: Failing to clean the surfaces properly can lead to leaks and gasket failure.
- Incorrect Torque Settings: Over-tightening or under-tightening bolts can cause gasket damage or improper sealing.
- Ignoring Manufacturer Recommendations: Always follow the vehicle manufacturer’s guidelines and specifications for head gasket installation.
Maintaining Your Engine After Head Gasket Installation
After successfully installing a new head gasket, maintaining your engine is crucial to ensure its longevity and optimal performance. Here are some essential tips for post-installation maintenance:
Regular Oil Changes
Frequent oil changes are vital to keeping your engine in top condition. Fresh oil ensures proper lubrication, reduces wear and tear, and helps maintain the integrity of the head gasket. Follow the manufacturer’s recommended oil change intervals and use high-quality oil suited for your engine type.
Monitor Coolant Levels
Coolant levels play a critical role in preventing overheating and maintaining engine temperature. Check the coolant reservoir regularly and top up as needed. Using the correct coolant mixture is essential for effective engine cooling and preventing corrosion within the cooling system.
Inspect for Leaks
Regularly inspect your engine for any signs of leaks. Look for oil or coolant leaks around the cylinder head and other engine components. Early detection and repair of leaks can prevent severe engine damage and ensure the head gasket remains intact.
Check Engine Performance
Pay attention to your engine’s performance. Any unusual noises, loss of power, or changes in fuel efficiency can indicate potential issues. Addressing these symptoms promptly can prevent more significant problems and maintain the engine’s health.
Maintain Proper Torque
Over time, the cylinder head bolts may need retorquing to ensure they maintain the correct pressure on the head gasket. Refer to your vehicle’s service manual for the recommended intervals and procedures for checking and retorquing the bolts.
Use Recommended Additives
Consider using engine additives designed to enhance lubrication and protect the head gasket. These additives can help reduce friction, prevent corrosion, and extend the life of the gasket and other engine components.
Signs of a Failing Head Gasket
Even with careful installation and maintenance, head gaskets can sometimes fail. Being aware of the warning signs can help you address issues before they become severe:
Overheating
If your engine consistently overheats, it could indicate a head gasket issue. Overheating can cause the gasket to fail, leading to more significant engine problems. Address overheating promptly to prevent damage.
White Smoke from Exhaust
White smoke from the exhaust pipe often indicates coolant entering the combustion chamber, a common symptom of a blown head gasket. This issue needs immediate attention to prevent further engine damage.
Contaminated Oil
Milky or frothy oil is a sign of coolant mixing with the oil, often due to a faulty head gasket. Check your oil regularly, and if you notice contamination, have your engine inspected and repaired.
Loss of Coolant Without Visible Leaks
If you notice a significant drop in coolant levels without any visible leaks, it could indicate that coolant is leaking internally due to a compromised head gasket.
Poor Engine Performance
Reduced engine performance, including rough idling, misfires, and loss of power, can signal a head gasket problem. These symptoms should be investigated to prevent extensive engine damage.
Professional Assistance
While installing and maintaining a head gasket can be a DIY project for experienced individuals, seeking professional assistance ensures the job is done correctly. Certified mechanics have the expertise and tools to diagnose and repair head gasket issues effectively, ensuring your engine runs smoothly.
Conclusion
Proper head gasket installation and maintenance are crucial for the health and performance of your engine. By following the detailed steps outlined in this guide, you can achieve a perfect fit and ensure the longevity of your engine. Regular maintenance and prompt attention to any signs of failure will keep your vehicle running efficiently.
Related Posts:
What is a Turbocharger and How Does a Turbocharger Work
4 Types of Head Gaskets and Their Materials and Benefits
Snap Ring Pliers Hacks: A Comprehensive Guide
FAQs About Head Gasket Installation:
What are the signs that my head gasket needs replacing?
Common signs that your head gasket needs replacing include:
Overheating: Frequent engine overheating can indicate a blown head gasket.
White Smoke: White smoke from the exhaust suggests coolant is leaking into the combustion chamber.
Contaminated Oil: Milky or frothy oil indicates coolant mixing with oil.
Loss of Coolant: A significant drop in coolant levels without visible leaks suggests an internal leak.
Poor Engine Performance: Rough idling, misfires, and loss of power can be symptoms of a failing head gasket.
Can I install a head gasket myself, or should I hire a professional?
While experienced DIY enthusiasts can install a head gasket themselves, it requires precise attention to detail and specialized tools. For those less experienced, it is recommended to hire a professional mechanic to ensure proper installation and avoid potential engine damage.
How often should I check and retorque the cylinder head bolts?
The need to check and retorque cylinder head bolts varies by vehicle and gasket type. Generally, it’s a good practice to check the torque after the initial installation and then again after about 500 miles. Always refer to your vehicle’s service manual for specific recommendations and intervals.
What type of head gasket should I use for my engine?
The type of head gasket you need depends on your engine specifications and the manufacturer’s recommendations. Common types include:
Multi-Layer Steel (MLS) Gaskets: Durable and commonly used in modern engines.
Composite Gaskets: Made from graphite or asbestos, suitable for older engines.
Copper Gaskets: Highly durable and often used in high-performance engines.
Consult your vehicle’s service manual or a professional mechanic to determine the best head gasket for your engine.
What precautions should I take during head gasket installation?
To ensure a successful head gasket installation, follow these precautions:
Thorough Cleaning: Clean the engine block and cylinder head surfaces meticulously.
Correct Alignment: Ensure the new head gasket is properly aligned with the engine block and cylinder head.
Proper Torque: Use a torque wrench and follow the specified bolt tightening sequence and torque settings.
Check for Damage: Inspect the engine block and cylinder head for warping or cracks before installation.
Use Quality Parts: Always use high-quality gaskets and parts recommended by the manufacturer.