
How to fix garage door cable is easier than you might think with the right guidance and tools. This detailed guide walks you through identifying cable issues, safely removing and replacing damaged cables, and adjusting spring tension correctly. You will also learn important maintenance tips and troubleshooting steps to keep your garage door working smoothly and safely for years, saving you time and costly repairs in the future.
Table of Contents
ToggleUnderstanding the Problem Before You Fix a Garage Door Cable
When your garage door suddenly refuses to open or closes unevenly, one of the most common culprits is the garage door cable. Learning how to fix garage door cable may sound intimidating, but with the right understanding, tools, and precautions, it’s a task you can manage safely and effectively. This first part of the guide will focus on identifying the problem, understanding how garage door cables work, and preparing for the repair process.
Also Read:
What Is a Garage Door Cable and Why Is It Important?
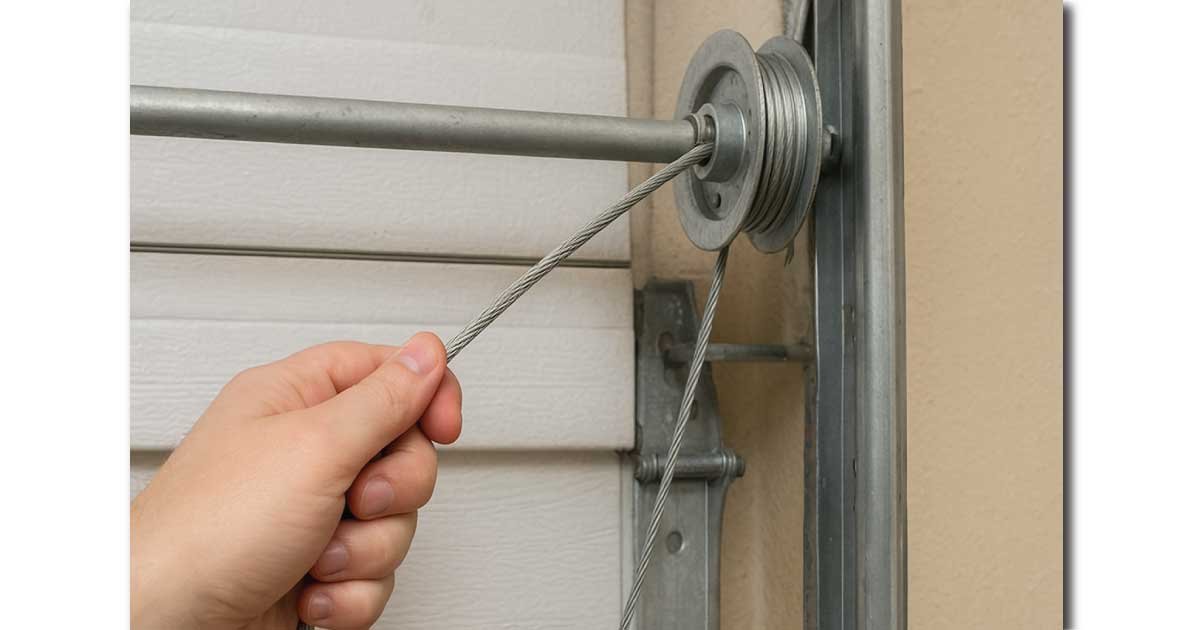
Before we get into how to fix garage door cable, it’s crucial to know what this cable does. A garage door cable works alongside the springs to lift and lower your door smoothly. These steel cables wind around pulleys or drums and carry much of the door’s weight.
Without a properly functioning cable, your garage door will either become unbalanced, jam, or refuse to operate at all. Attempting to force it open without addressing the cable issue can cause damage to the door and opener — or worse, lead to personal injury.
Common Signs Your Garage Door Cable Is Damaged
When you’re preparing to learn how to fix garage door cable, you first need to diagnose the problem. Here are the most common signs your cable might need repair or replacement:
The Door Opens Unevenly – One side moves faster or stays higher than the other.
Visible Fraying or Rust – Steel cables weaken over time due to rust or wear.
Door Won’t Open or Close Fully – The door may stop halfway.
Loose or Slack Cable – A cable hanging loosely from the drum or pulley.
Loud Bang or Snap Sound – Could indicate a cable or spring failure.
Ignoring these warning signs can make the eventual repair more complicated and dangerous.
Why Garage Door Cables Fail
Learning how to fix garage door cable also means understanding why they fail in the first place. Common causes include:
Wear and Tear – Years of daily use gradually weaken steel strands.
Rust and Corrosion – Exposure to moisture speeds up deterioration.
Misalignment – Poor installation or bent tracks put extra stress on cables.
Improper Tension – Cables wound too tightly or loosely can fail prematurely.
Accidents – Hitting the garage door with a car or heavy object can dislodge or damage the cable.
Knowing the cause helps you prevent the problem from happening again.
Also Read: How Much Does It Cost to Fix a Garage Door? Expert Guide
Tools and Materials You will Need for Garage Door Repair,
Before you start learning how to fix garage door cable, gather the necessary tools to make the process safe and efficient:
Adjustable wrench
Locking pliers
Flat-head screwdriver
Winding bars (for torsion spring doors)
Replacement garage door cable
Ladder
Safety gloves
Eye protection
WD-40 or similar lubricant
Having these tools ready ensures you won’t be scrambling mid-repair.
Safety Precautions You Must Take when Fix Garage Door Problems,
Fixing a garage door cable can be dangerous due to the high tension in the springs. Before you proceed with how to fix garage door cable, remember these safety tips:
Disconnect the Garage Door Opener – Prevent accidental activation.
Use Proper Tools – Never use improvised tools for winding springs.
Work With a Partner – An extra set of hands makes the job safer.
Wear Protective Gear – Gloves and goggles are essential.
Release Spring Tension Carefully – Sudden unwinding can cause injury.
Never underestimate the risks — garage door springs and cables are under immense force.
Identifying Your Garage Door Cable Type
When figuring out how to fix garage door cable, you will first need to identify which type you have. Most residential garage doors use one of two cable types:
Torsion Spring Cables – Run from the bottom of the door up to the cable drum at the spring shaft.
Extension Spring Cables – Attach to pulleys and run along the sides of the door.
The repair process is slightly different for each, so it’s important to know which system you’re dealing with before proceeding.
Preparing Your Workspace
A safe and organized workspace is critical when learning how to fix garage door cable. Here’s how to prepare:
Clear the Area – Remove vehicles, tools, and clutter.
Ensure Adequate Lighting – Good visibility prevents mistakes.
Position Your Ladder Correctly – Place it on a stable, flat surface.
Secure the Door – Clamp locking pliers onto the track below the rollers to keep the door from moving.
Once your workspace is ready, you’ll be prepared to tackle the actual repair in Part 2 of this guide.
Also Read: 7 Easy Steps for Garage Door Repair
Step-by-Step Guide on How to Fix Garage Door Cable
Now that you understand the basics and have prepared your workspace, it’s time to get hands-on. This section will take you through how to fix garage door cable step-by-step for both torsion and extension spring systems.
Step 1: Disconnect the Power and Secure the Door
Before touching anything, always disconnect your garage door opener from the power source. This ensures the motor won’t accidentally activate while you’re working.
Pull the emergency release cord to disengage the opener.
Use locking pliers or a C-clamp on the track below the roller to hold the door in place.
These safety steps are non-negotiable when learning how to fix garage door cable.
Step 2: Relieve the Spring Tension (Torsion Spring Systems)
For doors with torsion springs, the cables are under high tension, so you must release that tension carefully.
Insert a winding bar into one of the holes in the winding cone.
Hold the bar firmly, loosen the set screws on the cone, and allow the bar to turn slowly to release tension.
Work in quarter turns, switching winding bars until the spring is fully relaxed.
This part of how to fix garage door cable is critical — never use screwdrivers instead of winding bars.
Step 3: Remove the Old Cable
Once the tension is released (for torsion springs) or the springs are fully relaxed (for extension springs):
For Torsion Spring Cables
Locate the cable drum above the door.
Loosen the set screws and slide the cable out of the drum.
Detach the other end from the bottom bracket.
For Extension Spring Cables
Disconnect the cable from the pulley system.
Remove the hook or S-shaped attachment at the bottom of the door.
When you’re learning how to fix garage door cable, this is where you will notice any frayed strands or rust damage up close.
Step 4: Install the New Garage Door Cable
Now it’s time to reverse the removal process:
Torsion Spring Systems
Attach one end of the new cable to the bottom bracket on the garage door.
Run the cable up the side of the door and loop it into the slot on the cable drum.
Make sure the cable sits neatly in the drum grooves without crossing over itself.
Extension Spring Systems
Hook one end of the cable to the bottom bracket.
Run it through the pulleys according to the original setup.
Connect the other end to the S-hook or attachment point near the track.
Precise routing is essential when following how to fix garage door cable instructions — even a small misalignment can affect door balance.
Also Read: How Much Does It Cost to Repair a Garage Door?2025 Guide
Step 5: Reapply Tension to the Springs
For torsion systems:
Insert the winding bar into the winding cone.
Tighten the spring by making quarter turns in the correct direction (usually marked on the cone).
Re-tighten the set screws once the proper tension is reached.
For extension systems:
Reconnect the spring to its hook or bracket.
Check the pulley system to ensure the cable remains tight but not overly strained.
This is one of the most important safety steps in how to fix garage door cable because improper tension can cause door imbalance or sudden cable release.
Step 6: Test the Door’s Movement
Before restoring power:
Remove the locking pliers from the track.
Manually lift the door halfway — it should stay in place without drifting up or down.
Lower it slowly to check for smooth movement.
If the door jerks, tilts, or feels heavy, you may need to adjust the cable tension again. Testing is an essential part of how to fix garage door cable to ensure long-term reliability.
Also Read: How to Repair Garage Door: A Complete DIY Guide 2025
Step 7: Reconnect the Opener and Final Checks
Plug in the garage door opener or switch on the breaker.
Reattach the emergency release cord to the opener trolley.
Open and close the door using the motor, listening for any unusual noises.
Once everything works smoothly, apply a light lubricant to the cable and pulleys to extend their lifespan. This maintenance tip is often overlooked when people learn how to fix garage door cable, but it can prevent future problems.
A Video Guide About How to Fix Garage Door Cable
Maintenance, Troubleshooting, and Safety After Fixing Your Garage Door Cable
Fixing your garage door cable is a major step, but proper upkeep and knowing how to handle minor issues afterward are just as important. This final section completes your knowledge on how to fix garage door cable by covering these crucial areas.
Also Read: How Much to Fix Garage Door Off Track: Expert Guide 2025
Regular Maintenance Tips to Extend Cable Life
Once you have repaired or replaced the cable, consistent maintenance will help avoid frequent breakdowns:
Lubricate Cables and Pulleys Quarterly: Use a silicone-based lubricant or garage door-specific spray on the cables and pulleys to reduce friction and rust.
Inspect Cables Monthly: Look for signs of wear like fraying, rust, or slackness. Early detection means easier fixes.
Keep Tracks Clean and Aligned: Dirt or dents in the tracks can cause uneven cable wear. Clean tracks with mild detergent and check alignment every few months.
Test Door Balance Regularly: Manually lift the door halfway — if it doesn’t stay put, the cables or springs may need adjustment.
Avoid Forcing the Door: If the door resists movement, don’t force it open or closed; instead, inspect the cables and springs.
Common Post-Repair Issues and How to Troubleshoot Them
Even after learning how to fix garage door cable and doing the repair correctly, some problems may arise. Here’s how to identify and fix common issues:
Door Opens Unevenly: Likely causes: cable tension imbalance or misrouted cable. Re-check cable routing and adjust tension equally on both sides.
Cable Slips Off Drum: This often happens if the cable isn’t seated properly or if the drum grooves are worn. Make sure the cable is properly placed and replace the drum if damaged.
Cables Fray Quickly: Could be caused by rust, dirt, or damaged pulleys. Lubricate regularly and replace worn pulleys immediately.
Door Won’t Stay Open: This usually means cables or springs have lost tension. Carefully adjust spring tension or replace cables if needed.
Unusual Noises: Grinding or snapping noises could indicate cable rubbing against the track or damaged components. Inspect and lubricate all moving parts.
Also Read: How Much to Fix Garage Door Sensor: Affordable Costs 2025
When to Call a Professional
While many homeowners can manage how to fix garage door cable themselves, certain situations require expert help:
If you are uncomfortable working with high-tension springs.
When cables or springs snap suddenly.
If the door is severely out of balance or off its tracks.
For complex garage door systems or when specialized tools are needed.
Safety is paramount — professionals have the training and equipment to handle dangerous repairs safely.
Long-Term Safety Tips for Your Garage Door System
To prevent accidents and prolong your garage door’s life:
Never Attempt Spring Repairs Without Proper Tools: Springs store enormous energy and can cause serious injury if mishandled.
Keep Children and Pets Away During Repairs: Garage doors and cables are hazardous when being serviced.
Perform Safety Tests Monthly: Test auto-reverse features of electric openers and inspect cables visually.
Replace Both Cables at the Same Time: Even if only one cable is damaged, replacing both ensures even wear and performance.
Use Quality Replacement Parts: Cheap or incorrect cables can fail sooner and cause safety risks.
Summary: Mastering How to Fix Garage Door Cable
Learning how to fix garage door cable empowers you to save money, avoid emergency repairs, and keep your garage door running safely. Remember the three key steps:
Preparation and Diagnosis – Understand your door system and identify cable issues.
Safe Removal and Replacement – Follow step-by-step repair instructions carefully.
Maintenance and Troubleshooting – Keep cables lubricated, balanced, and inspected regularly.
With this knowledge, you’re ready to tackle common garage door cable problems confidently.
Also Read: How Much to Fix Garage Door Opener: Cost Guide 2025
FAQs:
How do I know if my garage door cable is broken?
Common signs of a broken garage door cable include the door opening unevenly, one side sagging, visible frayed or snapped cables, loud popping sounds, or the door failing to open or close completely. Inspect the cables along the sides for slack or damage. If you notice any of these symptoms, it’s important to fix or replace the cable promptly to avoid further damage or injury.
Can I fix a garage door cable myself?
Yes, many homeowners can fix a garage door cable themselves if they have basic DIY skills and follow safety precautions. It requires the right tools, careful tension release of springs, and attention to detail. However, if you’re unfamiliar with spring mechanisms or unsure about working with high-tension components, it’s safer to call a professional to avoid injury or costly mistakes.
How long does it take to replace a garage door cable?
Replacing a garage door cable typically takes between 30 minutes to 2 hours, depending on your experience and the door type. Torsion spring systems can take longer due to the careful tension adjustments needed. Taking time to prepare, follow safety steps, and test the door afterward ensures a reliable repair without rushing or risking damage.
What tools do I need to fix a garage door cable?
To fix a garage door cable, you’ll need adjustable wrenches, locking pliers, flat-head screwdrivers, winding bars (for torsion springs), a ladder, safety gloves, eye protection, and a replacement cable. Using the correct tools, especially winding bars for springs, is essential for safety and successful repair.
How often should garage door cables be replaced?
Garage door cables usually last 7 to 10 years depending on usage, environment, and maintenance. Regular inspection for wear, rust, or fraying helps determine when to replace them. Replacing cables proactively can prevent door malfunctions and safety hazards before a cable snaps unexpectedly.
What causes garage door cables to break?
Garage door cables break mainly due to wear and tear, corrosion from moisture, improper tension, misaligned tracks, or accidental damage. Daily use stresses the cables, and without proper lubrication or maintenance, they can fray and snap. Ensuring proper installation and regular upkeep helps extend cable life and reduces breakage risks.
Is it safe to operate a garage door with a broken cable?
Operating a garage door with a broken cable is unsafe and not recommended. The door may become unbalanced and could fall suddenly, posing serious injury risks or damage to property. If you suspect a broken cable, stop using the door and repair or replace the cable immediately before operating it again.