
Noticing a large hole in your drywall ceiling can be frustrating and if you have dealt with ceiling repairs before, you know how important it is to fix it the right way the first time. Over the years, I’ve handled dozens of drywall ceiling repairs—everything from accidental impacts to serious water damage and I have learned that even large holes can be patched successfully with the right method and materials.
In this post, I will walk you through a clear, step-by-step guide based on real experience in home repair and drywall restoration. Whether you are dealing with a hole from a leak or a heavy object, I will show you how to patch it properly, match ceiling texture, and get a finish that looks like the damage never happened.
Understanding Your Drywall Ceiling Repair Options
The first thing to understand is that drywall ceiling repair techniques can vary a lot depending on how big the hole is and what kind of ceiling you have. For tiny holes, like nail holes or small cracks, a dab of joint compound might be all you need. But for larger holes, especially those over six inches or so, you’re going to want to replace a section of drywall to ensure a solid, long-lasting repair.
Sometimes people ask if it’s possible to do a drywall ceiling patch without replacing the sheet. For small holes, yes. But with large holes, it’s almost always better to cut out the damaged part and insert a new piece of drywall. This keeps the ceiling stable and prevents sagging or future cracks.
Another factor is the ceiling’s texture. Repairing a textured drywall ceiling means you’ll have to match that texture after patching to keep the ceiling looking consistent. We’ll talk about how to do that later.
Tools Needed for Drywall Patch
Before you jump into the repair, make sure you have all the necessary tools handy. Having the right gear helps make the job easier and ensures a better outcome.
Here’s a quick table of tools needed for drywall patch and what each one is for:
| Tool/Material | Purpose |
|---|---|
| Drywall patch or drywall sheet | To replace the damaged ceiling area |
| Drywall saw or utility knife | To cut out the damaged drywall |
| Joint compound | To smooth over seams and finish patch |
| Drywall tape | To reinforce seams and prevent cracks |
| Sanding sponge or sandpaper | To smooth dried joint compound |
| Drywall screws and screwdriver | To secure new drywall piece |
| Drywall primer and paint | To finish and match ceiling color |
| Putty knife | To apply joint compound |
| Measuring tape | To measure the hole and patch size |
Having these ready will save you from frustrating stops mid-project.
Step-by-Step Guide: How to Patch a Large Hole in Drywall Ceiling
1. Prepare the Area
Start by clearing away any loose drywall around the hole. You want clean, solid edges so your patch fits nicely and holds well. Use a putty knife or utility knife to scrape off any peeling or crumbling drywall paper.
If your ceiling has texture, take care not to damage the surrounding pattern too much. Sometimes it helps to lightly sand the area around the hole to create a better surface for the patch.
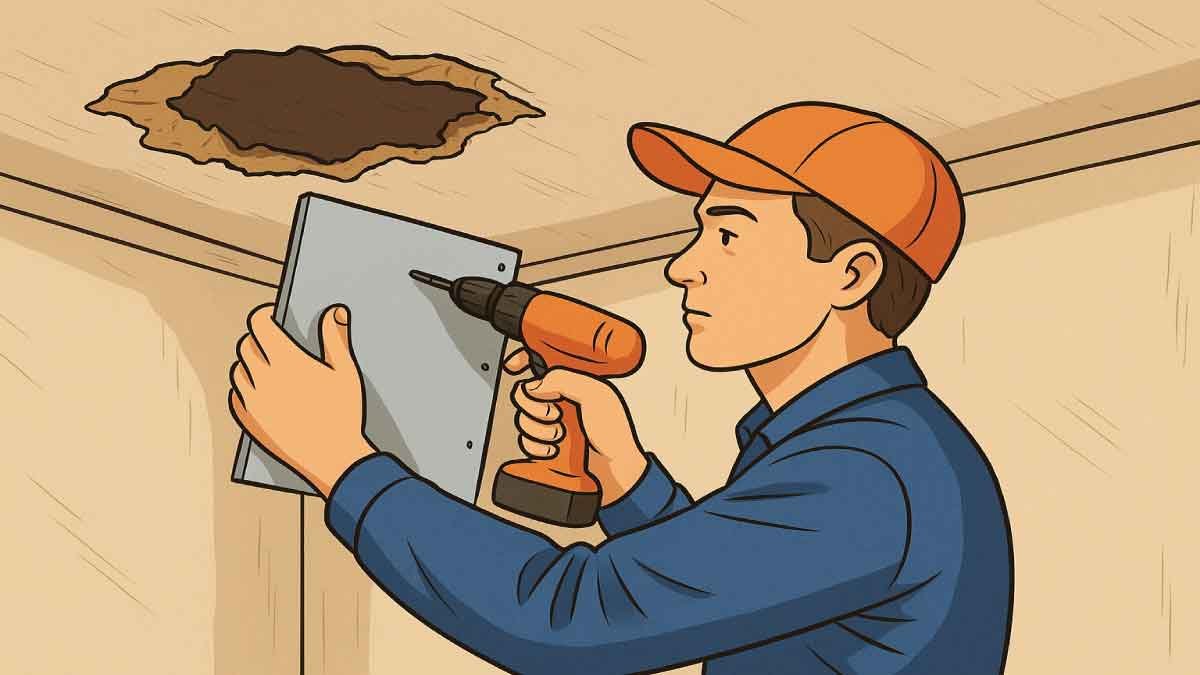
2. Cut Out the Damaged Section
This step is crucial for a neat repair. Use a drywall saw or utility knife to cut the hole into a neat square or rectangle. This might seem like extra work, but it makes fitting the patch easier and the repair stronger.
Be cautious here — sometimes electrical wires or plumbing run just behind the drywall. If you’re unsure, use a stud finder or consult a professional.
3. Measure and Cut the Drywall Patch
Measure the hole’s length and width carefully. Then, transfer those measurements to your new drywall piece and cut it to size. It should fit snugly in the cut-out section.
If you don’t have leftover drywall sheets, many hardware stores sell small patch kits or drywall pieces designed specifically for ceiling repairs.
4. Attach the Drywall Patch
Once you have got the right size patch, position it inside the hole and secure it to the wooden framing or ceiling joists behind with drywall screws. This keeps the patch firm and flush with the rest of the ceiling.
Make sure the patch is level any unevenness here will make the finishing step harder.
5. Apply Drywall Tape
Drywall tape is the secret ingredient for a crack-free repair. Apply drywall tape over all the seams where the patch meets the existing ceiling drywall.
For ceilings with texture or slight movement, mesh drywall tape works better because it’s flexible and less likely to bubble or crack.
6. Apply Joint Compound
This is the part where your patch really starts to blend in. Use a putty knife to spread a thin layer of joint compound over the taped seams and screw holes. Feather the edges out to smooth the transition between the patch and the ceiling.
Let the joint compound dry fully usually overnight to avoid cracking or shrinking.
7. Sand and Repeat
Once dry, gently sand the patch with a sanding sponge to smooth any bumps. If needed, apply a second or even third thin layer of joint compound, sanding between each coat.
The goal is a perfectly smooth surface that’s level with the rest of the ceiling.
8. Prime and Paint
To finish off, apply a drywall primer over the patch. Primer seals the joint compound and creates a uniform surface for painting.
After the primer dries, paint the ceiling with ceiling paint that matches your room’s color. For textured ceilings, use a roller that matches the texture pattern to blend the patch seamlessly.
Fixing Ceiling Water Damage Holes
Water damage can be tricky because moisture weakens drywall and encourages mold growth. Before patching a ceiling drywall hole caused by water leak, it’s critical to fix the source of the leak whether it’s a roof issue or plumbing problem.
When you cut out the damaged drywall, remove any wet or moldy pieces beyond the obvious hole. Use a mold-resistant joint compound and drywall patch to prevent future problems.
Also, let the area dry completely before starting the repair. Using a fan or dehumidifier helps speed this up.
Repairing Textured Drywall Ceiling
Many ceilings aren’t smooth they have textures like popcorn, knockdown, or orange peel. Patching a textured ceiling takes extra care.
After sanding and applying the last layer of joint compound, recreate the texture with a texture spray or sponge technique. It’s a bit of trial and error, so practicing on a scrap piece of drywall can save you frustration.
Matching the texture is key to making your repair blend in invisibly.
Drywall Ceiling Patch Without Replacing Sheet?
For holes smaller than 6 inches, you can often patch the hole without replacing the entire drywall sheet. Using a pre-made drywall patch kit or a piece of drywall mesh tape and joint compound, you can fill the hole, sand smooth, and paint.
But for large holes, this method isn’t strong enough, the patch can sag or crack over time, so replacing the drywall section is the safer bet.
Painting Over Drywall Ceiling Patch
Once your patched area is primed and smooth, it’s time to paint. Using a quality primer first ensures that the paint adheres properly and hides any color differences between the new compound and the old ceiling.
For textured ceilings, apply paint carefully using a roller or brush that mimics the ceiling texture to avoid an obvious patch mark.
Cost to Repair Drywall Ceiling Hole
If you are wondering about the cost to repair drywall ceiling hole, here’s a quick comparison between doing it yourself and hiring a pro:
| Repair Type | Estimated Cost (DIY) | Estimated Cost (Professional) |
|---|---|---|
| Small hole patch | $10 – $30 | $50 – $100 |
| Large hole patch with drywall replacement | $30 – $75 | $150 – $400 |
| Repairing water damage hole | $50 – $100+ | $200 – $600+ |
DIY saves money but takes time and patience. If you want a flawless finish or lack time, a professional is a good investment.
Plaster vs Drywall Ceiling Repair: What’s Best?
If you live in an older home, you might have a plaster ceiling instead of drywall. Repairing plaster is different because it’s thicker and more brittle.
Plaster repairs often involve multiple layers and sometimes lath backing. Drywall repair is generally simpler and more common in modern homes.
Before starting, identify which ceiling type you have so you use the right repair method.
Best Video Guide on How to Patch a Large Hole in Drywall Ceiling:
Final Tips for Patching Large Holes in Drywall Ceilings
Check for hidden damage: Make sure there’s no mold or rot behind the drywall before patching.
Use proper drywall screws: Screws should be long enough to reach the ceiling joists for secure fastening.
Take your time: Allow joint compound to dry fully and sand carefully for the smoothest finish.
Practice texture repair: If your ceiling is textured, practice the spray or sponge technique to get a match.
Safety first: Wear goggles and a dust mask when sanding to protect your eyes and lungs.
Conclusion
Fixing a large hole in your drywall ceiling might feel intimidating, but it’s definitely achievable with the right tools and some patience. Using the drywall ceiling repair techniques covered here, you can get a smooth, professional-looking repair that lasts.
Remember to fix any leaks first, replace damaged drywall sections, tape and mud carefully, and finish with primer and paint to blend your patch perfectly.
If you are ready to tackle this project, gather your tools and take it step-by-step you will be amazed at what you can accomplish with your own two hands.
If you want, I can also help you with related posts like “How to Fix Small Holes in Drywall Ceiling” or “Best Tools for Drywall Repair”. Just let me know!
FAQs:
How do I patch a large hole in a drywall ceiling?
To patch a large hole, start by cutting the damaged drywall into a neat square. Measure and cut a drywall piece to fit, then screw it into the ceiling joists. Apply drywall tape over the seams, cover with joint compound, sand smooth after drying, and finish by priming and painting. This method ensures a strong, seamless repair that lasts.
Can I patch a drywall ceiling hole without replacing drywall?
For holes smaller than 6 inches, yes you can use a drywall patch kit or mesh tape with joint compound. But for large holes, replacing the drywall section is better to avoid sagging or cracking. Cutting out the damaged area and installing a new drywall patch provides more durability and a smoother finish over time.
How long does it take for drywall compound to dry?
Drywall joint compound typically takes about 24 hours to dry fully, but drying time depends on room temperature, humidity, and compound thickness. Thin layers may dry faster, while thicker applications or humid conditions can slow drying. To ensure the best finish, wait until the compound is completely dry before sanding or applying additional coats.
How do I fix water damage holes in drywall ceilings?
First, identify and fix the water leak source. Remove damaged drywall, including soft or moldy areas. Let the area dry completely. Then, cut and install a new drywall patch, tape the seams, and apply joint compound. Use mold-resistant products for added protection. Proper drying and repair prevent mold growth and further damage.
What tools do I need to patch a drywall ceiling hole?
You will need a drywall saw or utility knife for cutting, a drywall patch or sheet, drywall screws and screwdriver, joint compound, drywall tape, a putty knife, sanding sponge or sandpaper, measuring tape, primer, and ceiling paint. Having all these tools ready will make the repair process smoother and help you achieve a professional-looking finish.
How do I match the texture on a patched drywall ceiling?
After sanding and applying the final coat of joint compound, use a texture spray or sponge to recreate the ceiling’s texture. Practice the technique on scrap drywall to get the pattern right. For popcorn or knockdown textures, special spray cans or tools work best. Matching the texture carefully helps your patch blend seamlessly with the rest of the ceiling.