
If you are new to metal fabrication or just stepping into the world of CNC (Computer Numerical Control) cutting, learning how to use a CNC plasma table can seem a bit intimidating at first. But don’t worry — this guide will walk you through everything step-by-step in a simple and easy-to-understand way.
From understanding how a CNC plasma table works to preparing files, operating the machine, and safety tips — we have covered it all. Whether you’re setting up a small shop or planning to take on custom cutting projects, this article will help you get started with confidence.
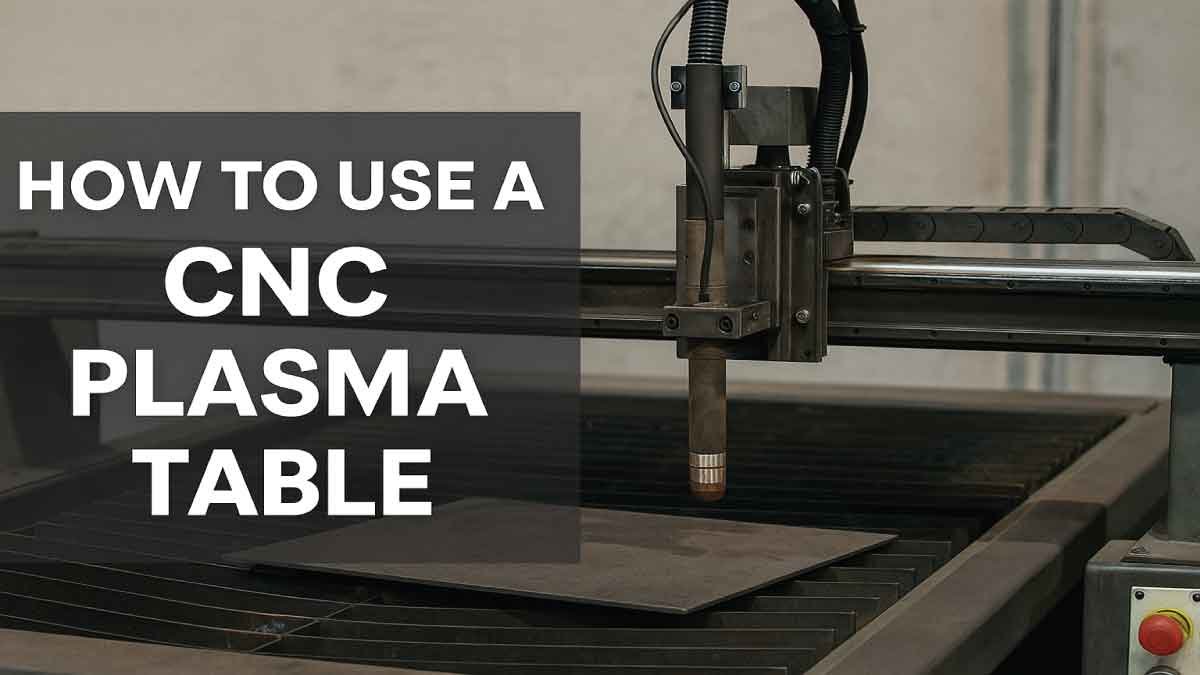
What is a CNC Plasma Table?
A CNC plasma table is a computer-controlled cutting machine that uses a plasma torch to cut through conductive metals such as steel, aluminum, brass, and copper. The term “CNC” refers to how the machine is guided using digital files and software, enabling highly accurate and repeatable cuts.
The plasma table includes a flat surface (table) where the metal sheet is placed. A plasma torch is mounted on a gantry system that moves in X, Y (and sometimes Z) directions, controlled by software to follow the precise cutting path.
Why Use a CNC Plasma Table?
Before diving into how to operate one, it’s helpful to understand why CNC plasma tables are so valuable:
Precision and Accuracy: CNC programming ensures clean, consistent cuts.
Speed: Plasma cutting is faster than oxy-fuel cutting and can be automated.
Versatility: Cuts various thicknesses and types of metal.
Repeatability: Ideal for producing multiple identical parts.
Low Cost per Cut: Efficient for small to medium-scale metal fabrication.
Essential Components of a CNC Plasma Table
Understanding the key parts of a CNC plasma table helps make sense of how it operates:
Plasma Torch: The tool that generates the high-temperature plasma arc.
CNC Controller: The computer system that interprets your design and controls the machine’s movements.
Stepper or Servo Motors: Move the torch along the programmed path.
Cutting Table: Supports the metal sheet, often with a water table to reduce heat and smoke.
Air Compressor: Supplies clean, dry air to create the plasma arc.
Design Software (CAD): Used to create or import designs (e.g., AutoCAD, Fusion 360).
CAM Software: Converts designs into machine-readable code (G-code).
CNC Control Software: Runs the G-code and controls the actual cutting process.
Step-by-Step: How to Use a CNC Plasma Table
Let’s now go through the process of using a CNC plasma table from start to finish.
1. Safety First: Wear Proper Protective Gear
Before doing anything, prioritize safety:
Wear safety glasses or a face shield.
Use flame-resistant gloves and clothing.
Have a well-ventilated workspace or exhaust system.
Make sure there’s a fire extinguisher nearby.
Check grounding and wiring to prevent electrical hazards.
2. Prepare Your Design File (CAD)
The process begins with creating or obtaining a design. This file contains the pattern or shape you want to cut.
Use a CAD program to design the part. You can draw simple shapes or complex artwork.
Save the file in a compatible format like DXF (Drawing Exchange Format).
Keep the design in 2D, as plasma cutting is primarily a flat-cutting process.
Tip: Many CNC plasma software tools come with built-in CAD features.
3. Convert Your Design into G-code (CAM)
Once you have your DXF file ready, you need to convert it into G-code, the language that tells the machine what to do.
Use CAM (Computer-Aided Manufacturing) software such as SheetCAM or Fusion 360.
Set parameters like:
Material type (e.g., mild steel)
Material thickness
Cutting speed
Torch height
Generate the toolpath, and export the G-code file.
4. Load the G-code into CNC Control Software
With your G-code ready, open your CNC control software (like Mach3, Mach4, or LinuxCNC).
Load the G-code file.
Set your machine’s zero point (origin), typically the lower-left corner of the material.
Preview the toolpath to ensure it matches your design and the layout of the material.
5. Set Up the CNC Plasma Table
Before starting the cut, ensure everything is correctly set up:
Secure the metal sheet flat on the table.
Align the torch over the starting point.
Make sure the torch height control (THC) is enabled (if available).
Check the air pressure and that the plasma cutter is on and functioning.
6. Perform a Test Cut
Before launching into your full design, always perform a test cut on a scrap piece:
Test for cut quality, speed, and torch height.
Adjust settings as needed.
Check for clean cuts, minimal dross (slag), and straight kerf lines.
7. Start the Full Cut
Once you’re confident everything is dialed in:
Hit “Start” on the CNC control software.
Monitor the machine closely for the first few minutes.
Watch for signs of misalignment, torch misfire, or material warping.
Let the machine do its job — it will follow the G-code path exactly.
8. Inspect and Clean the Finished Piece
After the cutting is complete:
Let the metal cool before touching.
Use a chipping hammer or grinder to remove dross from the edges.
Inspect the final product for accuracy.
If needed, sand, paint, or weld the piece as part of your project.
Video Guide, How to Use a CNC Plasma Table:
Tips to Improve Your CNC Plasma Cutting Skills
Learning how to use a CNC plasma table efficiently takes some practice. Here are a few tips to speed up the learning curve:
1. Use the Right Settings
Cutting parameters such as speed, amperage, and air pressure vary by metal type and thickness. Follow the plasma cutter manufacturer’s guidelines.
2. Maintain the Torch
Check the consumables (nozzle, electrode, shield) regularly and replace worn parts. A worn torch tip can lead to poor cut quality and machine damage.
3. Optimize Your Design
Avoid extremely tight corners or fine details in thick material — plasma cutters have a kerf width (cut thickness) that limits precision on very small features.
4. Learn from Each Cut
Keep notes on what worked (or didn’t) for each material and thickness. Over time, you’ll build a reference of successful cutting recipes.
Common Mistakes to Avoid
Even experienced operators can make mistakes. Here are a few to watch out for:
Incorrect torch height: Can lead to bad cuts or torch damage.
Wrong cutting speed: Too fast = incomplete cuts. Too slow = excess dross.
Skipping the test cut: A small trial run can save material and time.
Ignoring material cleanliness: Rust or oil on the surface affects arc performance.
Forgetting safety protocols: Always wear protective gear and follow fire safety rules.
Applications of CNC Plasma Tables
Now that you know how to use a CNC plasma table, you’ll realize how versatile it is:
Automotive Parts: Brackets, mounts, panels
Sign Making: Custom metal signs for homes and businesses
Architectural Designs: Decorative screens and panels
Industrial Components: Flanges, plates, and covers
Art and Sculptures: Creative cutouts and wall decor
Whether you’re a hobbyist, a small business, or a full-time fabricator, CNC plasma cutting opens up a world of creative and commercial possibilities.
CNC Plasma Table vs. Laser or Waterjet: Which One’s Right?
If you’re still exploring which cutting tool is best, here’s how a CNC plasma table compares:
| Feature | CNC Plasma Table | Laser Cutter | Waterjet Cutter |
|---|---|---|---|
| Material | Conductive metals only | Metals, wood, plastic | Any material |
| Thickness | Up to 1.5 inches (steel) | Best for thin materials | Can cut very thick parts |
| Speed | Fast | Medium-fast | Slower |
| Cost | Affordable | Expensive | Very expensive |
| Edge Finish | Good | Excellent | Excellent |
If you’re mainly cutting metal and want speed and affordability, a CNC plasma table is often the best choice.
Maintaining Your CNC Plasma Table
Proper maintenance ensures long life and consistent performance:
Clean the table after each use — remove metal debris.
Check torch parts and replace consumables as needed.
Inspect cables and connections regularly for wear.
Drain air compressor filters to avoid water in the lines.
Update software and firmware to keep your system stable and compatible.
Conclusion: Mastering CNC Plasma Cutting
Learning how to use a CNC plasma table doesn’t have to be complicated. By understanding the basics of design, setup, operation, and safety, you’ll be on your way to producing clean, professional cuts in no time.
Whether you’re creating custom signs, cutting parts for machines, or exploring artistic metalworking, the CNC plasma table is a powerful tool that brings precision and efficiency to your shop.
Take your time to learn each step, and remember — with every cut you make, you’re not just shaping metal, you’re mastering a skill that opens the door to endless fabrication possibilities.
FAQs:
What materials can I cut with a CNC plasma table?
A CNC plasma table is best suited for cutting electrically conductive materials, meaning anything that can carry an electric current. This includes mild steel, stainless steel, aluminum, brass, and copper. Thicker materials can also be cut depending on the power of your plasma cutter, but for clean, precise cuts, it’s ideal to stay within your machine’s rated cutting capacity. Always check your manufacturer’s guidelines before cutting unfamiliar materials.
Do I need to know CAD software to use a CNC plasma table?
Yes, a basic understanding of CAD (Computer-Aided Design) is essential. You’ll typically use CAD software to design the shapes or parts you want to cut, and then transfer that design into CAM (Computer-Aided Manufacturing) software to generate the toolpath. Fortunately, many modern systems are user-friendly and have templates, so even beginners can get started with some learning and practice. Free software like Fusion 360, Inkscape, or SheetCAM is a great way to start.
How accurate is a CNC plasma table for precision cutting?
CNC plasma tables offer impressive accuracy, often within ±0.01 to ±0.03 inches, depending on the quality of the machine and how well it’s maintained. That said, plasma cutting is generally less precise than laser or waterjet cutting, especially on very thin materials. For most metal fabrication, signage, automotive, or construction work, the accuracy is more than sufficient.
Can I use a CNC plasma table at home, or do I need an industrial setup?
You can absolutely use a CNC plasma table at home, especially with the availability of desktop-sized and DIY plasma tables. However, you need a few things in place: a well-ventilated area (because of the fumes), proper power supply, compressed air, and essential safety gear. While industrial tables require 3-phase power and larger spaces, hobbyists can find compact options that run on standard single-phase electricity.
What safety precautions should I follow when using a CNC plasma table?
Safety is crucial when using a CNC plasma table. Always wear proper protective equipment like a welding helmet or face shield, gloves, long sleeves, and closed-toe shoes. Ensure your workshop is well-ventilated or has an exhaust system to remove harmful fumes. Also, keep a fire extinguisher nearby, and never leave the machine running unattended. Plasma cutters operate at high temperatures and voltages, so respect the machine and follow all manufacturer safety instructions.