
CNC (Computer Numerical Control) machines have revolutionized the way we fabricate parts, build prototypes, and produce components in industries like manufacturing, aerospace, automotive, and even DIY crafting. If you’re new to CNC machining, it might seem a little intimidating. But once you understand the basics, it becomes a powerful skill that opens up endless possibilities.
In this complete guide, we’ll walk you through how to use a CNC machine step by step, using natural language and practical explanations. We’ll also cover essential secondary topics like CNC machine setup, programming, safety, and more. Whether you’re a beginner or looking to refresh your knowledge, this guide is for you.
Step 1: Understand the CNC Machine Basics
Before you even touch a machine, it’s important to understand what a CNC machine is and how it works. CNC machines use computerized controls to manipulate and automate cutting tools, offering high precision, repeatability, and speed. This is a huge leap from traditional manual machining, where human hands control the process.
You’ll find different types of CNC machines such as mills, routers, plasma cutters, and lathes. Each machine type is suited to specific tasks, from engraving and cutting wood to machining aerospace-grade metals. Knowing the core components—like the spindle, table, motors, and the CNC controller—is the first step toward mastering CNC machining.
Understanding the CNC controller instructions is especially crucial. This part of the machine receives your G-code and translates it into precise mechanical movements. It’s where you’ll input commands, control feeds and speeds, and start or stop operations.
Step 2: Safety First – CNC Machine Safety Tips
CNC machines are powerful tools, and with great power comes great responsibility. Ignoring safety can lead to accidents, injuries, or damage to expensive equipment. Following standard CNC machine safety tips ensures that your machining environment remains secure and productive.
Start by wearing the right safety gear: safety goggles, ear protection, and snug-fitting clothes. Keep your work area clean and clutter-free to avoid tripping or tool mishandling. Always inspect the machine before use—look for loose parts, damaged wires, or tool wear.
Another key practice is learning how to use the emergency stop button and making sure you never leave the machine unattended while it’s running. If something goes wrong, being close by allows you to act quickly. Safe habits help you focus on learning and getting good results without unnecessary risks.
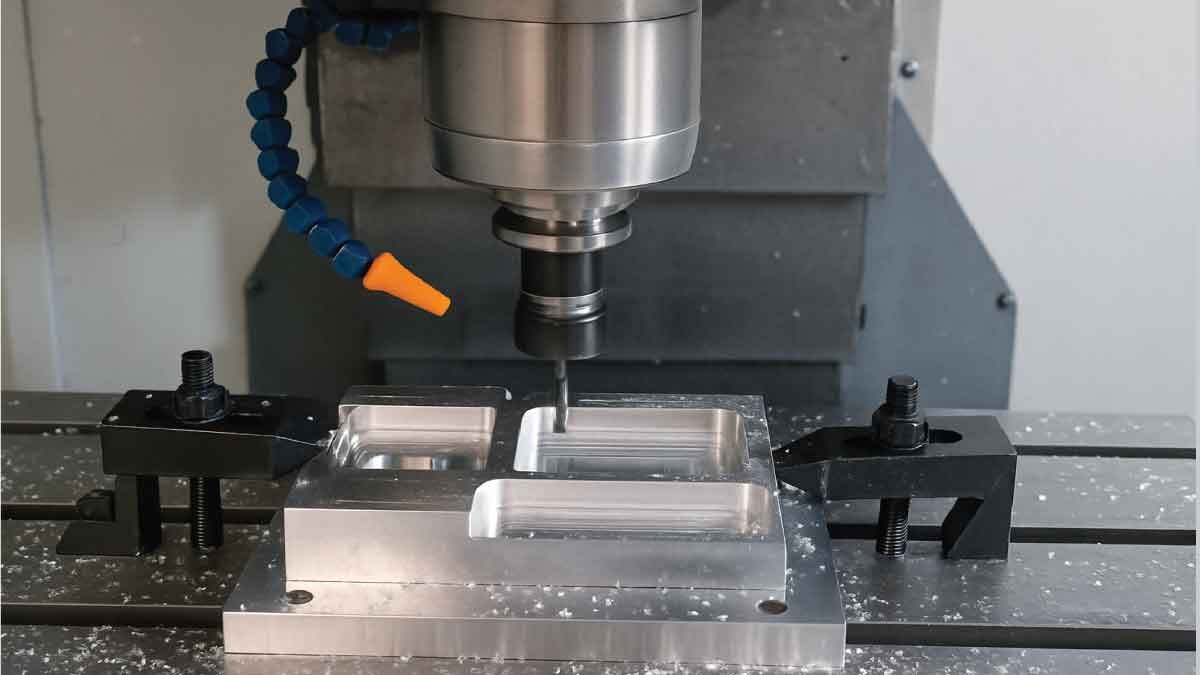
Step 3: CNC Machine Setup Process
The CNC machine setup process is where preparation meets precision. Before you run a single job, you need to ensure the machine is ready and properly configured.
Start by powering on the CNC machine and referencing the axes, also known as homing. This tells the machine where the physical limits are, ensuring accurate movements. Next, inspect and clean the machine bed and ensure the workspace is clear.
Select the right tool for your job—whether it’s an end mill, drill bit, or engraving tool—and securely install it in the spindle. Double-check tool tightness and verify the tool is compatible with the material and operation.
Then secure your workpiece using clamps, a vise, or a vacuum bed. Alignment is important, so use alignment tools or jigs if necessary. Finally, load the correct G-code file to the controller, either through USB, direct computer connection, or via a network.
Step 4: How to Load Material in CNC
Loading material might sound straightforward, but proper technique ensures success and prevents errors during machining. Knowing how to load material in CNC can make a huge difference in your final outcome.
Start by selecting the right material for your project. Wood, plastics, aluminum, and steel all behave differently under machining. Once selected, cut it to the rough dimensions needed and clean the surface of dust or oils.
Choose a fixturing method appropriate for your part. For small jobs, a vise works well. For large, flat sheets, clamps or vacuum tables are preferred. Make sure your material is square with the machine bed and won’t shift or vibrate. Loose material can ruin your part and damage your tools.
Finally, verify your Z-axis clearance so the spindle doesn’t crash into the material on startup. Secure materials properly to ensure repeatability and safety.
Step 5: CNC Machine Programming Basics
To tell a CNC machine what to do, you need to program it. Learning CNC machine programming basics is a key step in becoming a skilled operator. While there are many ways to program a CNC machine, G-code is the most common language used.
A basic G-code program includes tool commands, movement instructions, and spindle control. Here’s a quick example:
G21 ; set units to mm
G90 ; absolute positioning
M6 T1 ; tool change to tool 1
G0 X0 Y0 ; move to origin
G1 Z-1.0 F100 ; lower tool
G1 X50 Y50 F300 ; cut line
M5 ; stop spindle
M30 ; end program
If writing G-code manually feels daunting, don’t worry. Most users rely on CAM (Computer-Aided Manufacturing) software to generate code from 3D models. These tools are user-friendly and let you preview toolpaths, saving time and effort.
If you’re just starting out, many online resources offer G-code for beginners tutorials and exercises to help you get familiar.
Step 6: Load the G-Code File
After generating your G-code, it’s time to send it to the CNC machine. This step ensures your machine knows what tasks to perform. Most machines have a USB port or support file transfer via Ethernet or SD cards.
Load the file onto your CNC controller using its onboard interface. Many modern CNC systems allow previewing the toolpath before cutting begins. Always take advantage of CNC simulation software to visualize movements, detect errors, and verify dimensions before real cutting starts.
During this step, it’s important to double-check units (mm or inches), coordinate systems, and any custom machine settings. This minimizes risk and maximizes output.
Step 7: Set Your Zero Point – Zero Setting in CNC Machine
Setting your zero point is one of the most critical steps for accuracy. Without proper zero setting in CNC machine, your machine won’t know where your part begins, which can lead to offsets and wasted material.
To set the zero, jog your machine manually to the starting corner (usually bottom-left) of your material. Lower the tool until it just touches the surface—some use a piece of paper as a spacer. Then set your X, Y, and Z to zero on the controller.
If your machine supports touch probes or auto-zero tools, use them—they save time and improve repeatability. Always confirm your zero is saved correctly before you hit “Start.”
Step 8: Start the Operation – CNC Machine Operation Steps
With everything ready, it’s time to cut. The CNC machine operation steps are where your planning and setup come together in a live run. Begin by turning on the spindle, either manually or through the controller.
Double-check that your safety gear is on and the emergency stop is within reach. Then hit “Cycle Start” to begin execution. Watch the machine carefully for the first few movements—this is your chance to catch problems early.
Avoid distractions during the run. Listen for strange noises, vibrations, or tool chatter. These can indicate feed rate issues or tool wear. Stay alert and responsive throughout the process.
Step 9: Tool Changing in CNC Machine
Complex jobs often require multiple tools. Understanding tool changing in CNC machine operations is essential for success. On advanced machines, tool changers automatically switch tools mid-program. On manual machines, you’ll need to pause and switch by hand.
Each tool must be correctly loaded, measured, and set with the proper offsets. Make sure your G-code reflects these tool numbers and that tools are in good condition. Worn tools cause inaccuracies, bad surface finish, and possible breakage.
Practice smooth, safe tool swaps and ensure your machine recognizes the tool change command before resuming operations.
Step 10: Post-Operation Tasks and Maintenance
Finishing a project doesn’t mean you’re done. Every successful job should end with cleanup and care. These CNC machine maintenance tips ensure your machine stays reliable and performs well over time.
Clear chips and dust using an air blower or vacuum. Clean the machine table, spindle, and nearby surfaces. Check coolant or lubricant levels if your machine uses them.
Inspect your tools for wear and replace if necessary. Record the job details and any issues in your maintenance log. This habit helps track tool life, troubleshoot problems, and plan better in the future.
Common CNC Machine Mistakes to Avoid
Everyone makes mistakes, but knowing what to avoid can save time, money, and materials. Some common CNC machine mistakes include:
- Not simulating the job before cutting
- Incorrect zeroing
- Loose fixturing
- Using dull or wrong tools
- Ignoring machine sounds or alarms
Prevention is better than correction. Use checklists, simulation tools, and step-by-step routines to avoid these common pitfalls.
CNC Machining Workflow: A Bird’s Eye View
Let’s take a broad look at the CNC machining workflow to tie everything together:
- Design your part in CAD software
- Create toolpaths in CAM software
- Export and verify the G-code
- Set up the machine and secure material
- Load the G-code and set zero points
- Run the operation
- Change tools as needed
- Perform cleanup and maintenance
This logical flow ensures consistency and high-quality results. Once you’ve mastered this cycle, CNC machining becomes second nature.
Beginner Guide to CNC Machining
Think of this section as your personal roadmap. This beginner guide to CNC machining is about building confidence and reducing overwhelm.
Start with simple designs and common materials like MDF or acrylic. Use basic tools and slow speeds. Focus on learning the steps and understanding how the machine responds. Make mistakes, learn from them, and grow with each project.
Online forums, tutorials, and CNC communities are great places to learn and share. As you grow, experiment with metals, 3D contours, and complex toolpaths.
CNC Cutting Techniques
Different jobs require different CNC cutting techniques. Here are a few important ones to know:
- Pocketing: Removing material from within a shape. Great for cavities.
- Profiling: Tracing around the outer edge of a part.
- Facing: Flattening the surface of your material.
- Engraving: Cutting fine designs or text.
- Drilling: Creating holes using spiral or plunge drills.
Each technique needs specific tool types and feed rates. Understanding when and how to use them helps you produce better parts more efficiently.
Final Thoughts: How to Use a CNC Machine
Mastering CNC machining takes time and effort, but the rewards are worth it. From CNC machine setup to advanced toolpaths and finishing techniques, this skill empowers you to turn digital designs into real-world creations.
Focus on learning the process step by step. Use the right tools, prioritize safety, and stay curious. With practice and patience, you’ll gain confidence and open up new possibilities in fabrication, prototyping, and even creative art.
Whether you’re a student, hobbyist, or aspiring entrepreneur, CNC machining is a valuable, modern skill that’s here to stay. Happy machining!
FAQs:
What is the easiest CNC machine for beginners?
For beginners, desktop CNC routers like the Shapeoko or X-Carve are ideal. They’re affordable, have a user-friendly interface, and are supported by active communities. These machines are great for learning CNC basics such as toolpaths, materials, and safety. Starting with a simpler model helps you build confidence before moving on to more advanced machines like CNC mills or lathes.
Do I need to know G-code to use a CNC machine?
Not necessarily! Many modern CNC machines work with CAM software that automatically generates G-code from your designs. However, understanding the basics of G-code—like movement commands (G1, G0) and spindle control—can help troubleshoot problems and optimize toolpaths. It’s like knowing how to read sheet music if you’re a musician: helpful, but not required to start playing.
How do I choose the right material for CNC machining?
Choosing the right material depends on your project’s purpose. Wood is beginner-friendly and forgiving. Acrylic is great for signs and displays. Aluminum offers strength and precision for mechanical parts. Steel requires more experience and rigid machines. Always consider the hardness, machinability, and end-use of the part. For new users, start with softer materials before progressing to metals.
How long does it take to learn CNC machining?
Most beginners can learn basic CNC machining in a few weeks, especially if using beginner-friendly machines and software. Mastering more advanced skills like manual G-code writing, complex toolpaths, and multi-axis machining may take several months. Learning by doing—running simple projects, troubleshooting, and improving each time—is the most effective way to gain hands-on experience.
Can I use a CNC machine at home?
Absolutely! Many hobbyists and small business owners use desktop CNC machines at home for woodworking, engraving, and small-scale prototyping. Just ensure you have a safe, ventilated workspace with access to power and proper dust collection. Choose a compact, beginner-friendly CNC machine and use basic safety gear. It’s a great way to build skills or even start a side hustle.
What software do I need for CNC machining?
You typically need three types of software: CAD for designing (like Fusion 360 or SketchUp), CAM for generating toolpaths (like Carbide Create or VCarve), and CNC controller software (like Mach3 or GRBL) to run the machine. Some all-in-one platforms include all three. Choose software that matches your machine and skill level, and always check for tutorials to get started faster.