
A beautiful concrete patio can transform your outdoor space into a relaxing haven for family and friends. But over time, cracks can appear, making your patio look worn and neglected. Whether caused by weather, ground movement, or everyday wear and tear, cracks in your concrete patio are common and they don’t have to be permanent. Knowing how to fix cracks in concrete patio properly can restore its appearance and extend its life.
In this guide, we’ll walk you through the best methods for concrete patio crack repair, share handy DIY tips, and help you prevent future damage.
Why Do Cracks Appear in Concrete Patios?
Before diving into repairs, it’s helpful to understand the causes of cracks in concrete patios. Common reasons include:
Soil settling or shifting beneath the patio, which creates stress.
Temperature changes causing concrete to expand and contract.
Improper installation, such as inadequate curing or poor mixing.
Heavy loads or impacts, including furniture or foot traffic.
Water intrusion and freeze-thaw cycles, which can cause concrete to crack over time.
Recognizing these causes will help you choose the right repair method and take steps to prevent future cracking.
Assessing the Damage: When to Repair and How
Cracks in concrete patios can range from tiny hairline cracks to larger, more serious breaks. The first step is assessing the damage.
Hairline cracks are narrow, usually less than 1/8 inch wide, and mostly cosmetic.
Medium cracks (1/8 to 1/4 inch) may require filling and sealing.
Large cracks or chunks missing need more extensive repair or resurfacing.
Once you’ve evaluated the crack size and severity, you can decide on the best approach to fill cracks in concrete patio.
DIY Concrete Patio Repair: Step-by-Step
Cracks in your concrete patio can be unsightly and eventually worsen if left untreated. Fortunately, with a few basic tools and the right materials, you can fix them yourself. This step-by-step guide will help you restore the surface, protect it from future damage, and save money on professional repairs.
Tools and Materials Needed:
Concrete crack filler or epoxy
Wire brush or scraper
Pressure washer or hose
Caulking gun (if using crack filler tubes)
Putty knife or trowel
Concrete sealant
Repair Steps:
Step 1: Clean the Crack Thoroughly
Start by scrubbing the crack with a wire brush to remove loose debris, dirt, and crumbling concrete. Follow up with water or a pressure wash if needed. A clean crack is essential for the filler to bond properly, so don’t rush this step—attention to detail here makes all the difference.
Step 2: Dry the Area Completely
Once the area is clean, let it dry completely. This is an often-overlooked step, but it’s crucial. Moisture trapped in the crack can prevent fillers from sticking or curing correctly. Wait for a sunny, dry day, and use a leaf blower or rag to speed up the drying if necessary.
Step 3: Choose the Right Filler
The size and depth of the crack will determine the best repair material. For smaller, non-structural cracks, a flexible concrete crack filler is ideal. For wider or deeper cracks, use epoxy or a cement-based patching compound. Choosing the right product ensures durability and a longer-lasting patio surface.
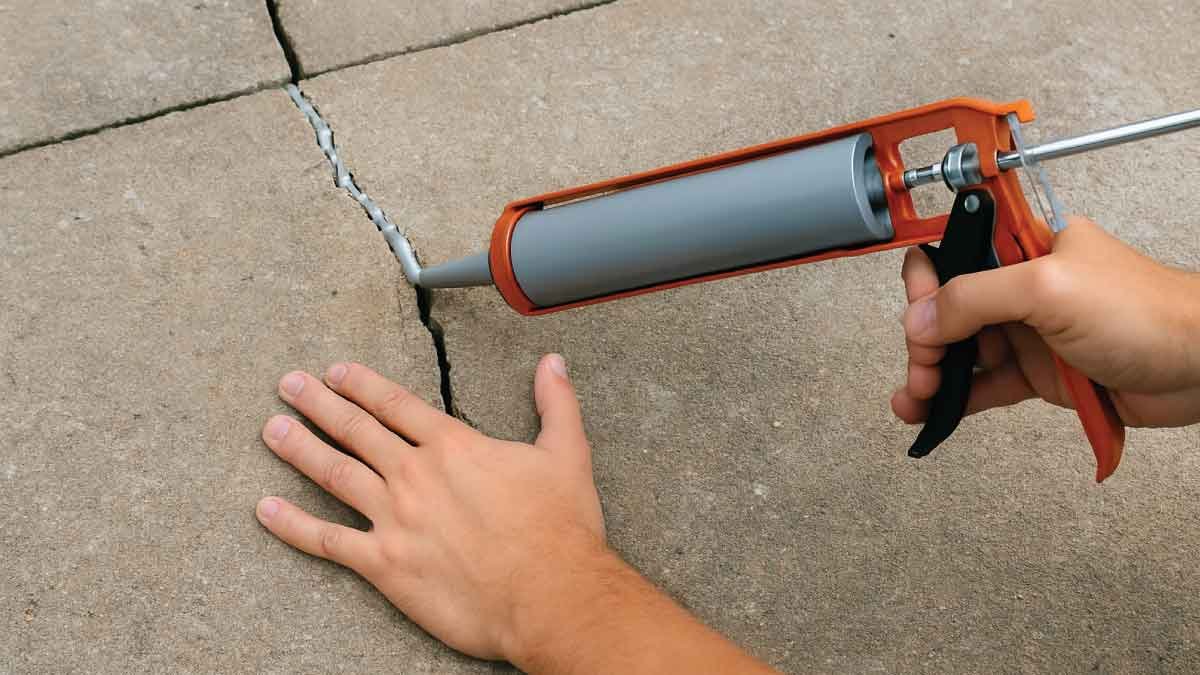
Step 4: Apply the Filler
Using a caulking gun or trowel, apply the filler carefully into the crack. Make sure to press it deeply into the void to ensure it bonds fully and holds up under weight and weather changes. Work slowly and deliberately—this step is key to a successful repair that won’t fail prematurely.
Step 5: Smooth the Surface
After applying the filler, use a putty knife or trowel to smooth the surface and remove any excess. Try to blend the repair with the surrounding patio area as much as possible. A well-smoothed patch will not only look better but also prevent tripping hazards and further wear.
Step 6: Allow to Cure
Follow the manufacturer’s recommended curing time, which could range from a few hours to several days. During this period, avoid walking or placing furniture on the repaired area. Proper curing strengthens the bond and ensures the patch lasts through changing temperatures and heavy use.
Step 7: Seal the Repaired Crack
Once the repair is fully cured, apply a high-quality concrete sealant over the area. This protects the surface from water penetration, UV rays, and general wear. Sealing also enhances the appearance of the patio and helps prevent future cracking. Reapply the sealant every few years for long-term results.
Best Way to Fix Patio Cracks for Longevity
For a durable and lasting repair, many experts recommend using epoxy for patio cracks. Epoxy injections bond the crack edges tightly and restore structural strength. This method is especially useful for wider or deeper cracks.
Epoxy repairs also resist moisture penetration, preventing future damage from freeze-thaw cycles or water infiltration. If your cracks are extensive or you want a professional finish, epoxy injection is a smart choice.
Repairing Large Cracks in Patio Concrete
Large cracks or those that cause uneven surfaces require more attention. Sometimes, a simple filler isn’t enough. You might consider concrete resurfacing for patios to cover and level the area.
Resurfacing involves applying a thin layer of concrete overlay, which can hide cracks and improve the patio’s look. It also adds a protective layer against future cracking. This is a good solution when multiple cracks are present or your patio surface is uneven.
Preventing Cracks in Concrete Patios
Keeping your patio in top shape starts with prevention. Instead of waiting for cracks to appear, a little proactive care can go a long way. By using smart sealing techniques and regular maintenance, you can protect your patio from weather damage, heavy use, and natural aging for years to come.
Apply a Waterproofing Sealant Regularly
Sealing your concrete patio every few years is one of the best ways to prevent cracks. A good waterproof concrete sealant protects the surface from moisture intrusion, freeze-thaw cycles, and staining. Choose a sealant suited to your climate and make it part of your routine outdoor maintenance checklist.
Ensure Proper Drainage Around the Patio
Water is the enemy of long-lasting concrete. Poor drainage can lead to pooling, which seeps into the concrete and causes cracks as temperatures change. Make sure your patio slopes slightly away from the house and keep nearby gutters and downspouts clear to direct water safely away.
Avoid Heavy Impacts and Dragging Furniture
Concrete is tough, but repeated impact or dragging heavy objects like grills, planters, or furniture legs can create surface stress. Use pads under furniture and lift rather than drag items. Preventing these small abrasions adds up to a stronger, longer-lasting patio surface over time.
Use Control Joints During Construction
If you’re building or resurfacing a patio, don’t skip the control joints. These are intentional, shallow cuts made into the concrete that let it expand and contract without cracking. They’re especially important in large slabs and help direct stress away from the surface naturally over time.
Perform Regular Inspections and Seal Small Cracks Early
Walk your patio every season to check for tiny cracks or chips. Sealing small cracks early with a crack filler prevents them from turning into larger problems. Routine inspections help you catch issues before they grow and save you money on major repairs later.
How to Fix Hairline Cracks in Concrete Patio
Hairline cracks in concrete patio are usually harmless but can worsen if ignored. For these tiny cracks, a liquid concrete sealer or acrylic filler is ideal.
Simply clean the crack, apply the liquid filler with a brush or syringe, and allow it to dry. This quick fix stops water from entering and prevents dirt buildup, keeping your patio looking neat.
A Video Guide On How to Fix Cracks in Concrete Patio:
Tools for Concrete Patio Repair
Using the right tools for concrete patio repair can make your project smoother and more effective. Besides the filler or epoxy, consider:
Wire brushes or grinders for surface prep
Caulking guns for precise filler application
Trowels or putty knives for smoothing repairs
Pressure washers to clean surfaces
Safety gear like gloves and goggles
Having the correct tools ensures you can tackle cracks properly and get a professional finish.
Concrete Patio Maintenance Tips
Regular upkeep extends the life of your patio and reduces cracking. Here are some simple concrete patio maintenance tips:
Sweep and clean regularly to remove debris that can trap moisture.
Inspect for cracks after winter or heavy rain.
Seal the surface with a quality concrete sealant every 2-3 years.
Avoid using harsh chemicals or salts that can degrade concrete.
Address minor cracks promptly with filler.
Good maintenance keeps your patio safe, attractive, and crack-resistant.
Conclusion About How to Fix Cracks in Concrete Patio
Fixing cracks in your concrete patio doesn’t have to be complicated or expensive. Whether it’s a tiny hairline crack or a larger break, there are effective repair methods and products available. From simple DIY concrete patio repair using crack fillers to professional epoxy injections and resurfacing, you can restore your patio’s beauty and strength.
By understanding the causes of cracks in concrete patios, using the best way to fix patio cracks, and following up with regular maintenance and patio crack sealing tips, you’ll keep your outdoor space looking great for years to come.
If you take the time to address cracks early and use the right materials, your concrete patio can remain a stunning, functional centerpiece for your home outdoor living.
FAQs:
How do I fix small cracks in my concrete patio?
For small cracks, start by cleaning the crack thoroughly to remove dirt and debris. Use a concrete crack filler or a liquid sealer designed for patios. Apply it evenly with a caulking gun or brush, then let it dry completely. This simple fix helps prevent water from seeping in and stops the crack from worsening.
Can I use epoxy to repair cracks in a concrete patio?
Yes, epoxy is a great choice for repairing cracks, especially larger or deeper ones. It bonds strongly to concrete and seals the crack against moisture. Epoxy injection can restore the patio’s strength and prevent further damage. It’s more durable than typical fillers, making it a popular option for long-lasting repairs.
What causes cracks in concrete patios?
Cracks in concrete patios often result from soil settling, temperature fluctuations, or improper installation. Water penetration and freeze-thaw cycles can also damage the concrete over time. Heavy loads or impacts may contribute too. Understanding the cause helps choose the best repair method and prevents future cracking.
How can I prevent cracks from forming in my concrete patio?
To prevent cracks, ensure your patio is built on properly compacted soil with good drainage. Use control joints to allow for natural expansion and contraction. Regularly seal the surface to keep moisture out and avoid dragging heavy furniture that could stress the concrete. Maintenance is key to longevity.
When should I call a professional for patio crack repair?
If cracks are large, growing, or causing uneven surfaces, it’s wise to call a professional. Also, if water is leaking through or the patio feels unstable, expert help is important. Professionals can assess structural issues and offer repairs like epoxy injection or resurfacing that DIY methods can’t match.