
Introduction: How to Patch a Hole in Drywall
Accidents happen, and holes in drywall are one of the most common household repair issues. Whether it’s a doorknob dent, nail hole, or a larger gash, knowing how to patch a hole in drywall can save you time and money. The good news? It’s not as hard as it looks. With the right tools and a little patience, you can make your wall look brand new.
In this guide, we’ll walk you through everything from fixing small holes to larger drywall damage. We’ll also discuss the best tools, materials, and techniques to help you tackle any drywall problem like a pro.
Why It’s Important to Patch Drywall Correctly
Poor drywall repair can leave behind unsightly bumps, uneven textures, and visible seams. A smooth patch job not only restores your wall’s appearance but also maintains the structural integrity of your home.
Let’s dive into the step-by-step instructions on how to fix small hole in drywall and handle larger repairs too.
Tools Needed to Patch Drywall
Before you begin, gather the following tools:
- Utility knife
- Putty knife
- Sandpaper (medium and fine grit)
- Drywall saw (for larger holes)
- Drill (if using screws)
- Drywall patch kit
- Drywall mud (joint compound)
- Drywall tape or mesh
- Primer and paint
Having these essentials on hand ensures you don’t have to stop mid-project.
How to Fix a Small Hole in Drywall
Got a small hole in your wall? Maybe you just removed a picture frame, a wall hook, or a shelf bracket—and now you’re left with those annoying little holes that seem to catch the eye every time you walk by. The good news? Fixing a small hole in drywall is one of the quickest and easiest home repairs you can do.
Small holes typically less than half an inch don’t require a lot of time, tools, or skill to repair. Whether you’re a first-time DIYer or just need a refresher, here’s a simple step-by-step guide to get your wall looking good as new.
Step 1: Clean the Area
Start by cleaning the area around the hole. Use a utility knife to gently cut away any loose drywall or flaking paint. If the hole has jagged edges or leftover debris inside, carefully scrape it out so you’re left with a clean surface. This helps your patch adhere better and gives you a smoother finish.
Tip: Don’t rush this step. A clean hole means a cleaner final result.
Step 2: Apply Drywall Mud
Now grab your putty knife and a bit of drywall joint compound (often called drywall mud). Scoop up a small amount and press it into the hole. Then, using the flat edge of the knife, spread the mud across the hole, smoothing it out so it blends with the wall around it.
You don’t need a thick layer just enough to fill the hole and even out the surface. If you use too much, you’ll have more sanding to do later.
Optional: If you have a drywall repair kit, now’s a good time to use it. These kits usually include everything you need mud, a small putty knife, sanding pad, and sometimes even paint.
Step 3: Let It Dry
Once the hole is filled, let the compound dry completely. This can take anywhere from 30 minutes to a few hours depending on the product and humidity levels in your home.
If you’re unsure whether it’s dry, gently touch the surface. If it still feels cool or tacky, give it more time.
Step 4: Sand the Surface
When the mud is dry, use fine-grit sandpaper (around 220 grit works well) to lightly sand the area until it’s flush with the wall. Be gentle just enough to smooth out any bumps or ridges.
Wipe away the dust with a damp cloth or a dry paper towel before moving on to the next step.
Step 5: Prime and Paint
Finish the job by applying primer over the patched area. This seals the compound and helps the paint stick better. Once the primer dries, touch up the spot with your wall paint. Feather the edges with a small brush or roller so the new paint blends in with the existing color.
Done!
And that’s it! The hole is gone, your wall looks clean again, and it probably only took you 15 to 30 minutes of actual work. Fixing small drywall holes is a great way to keep your walls looking neat, especially if you’re planning to move out, redecorate, or just refresh your space.
Once you try it, you’ll see why this is one of the most satisfying and easy DIY home fixes anyone can do.
Let me know if you’d like a printable checklist or toolkit guide for future repairs!
How to Repair a Large Hole in Drywall (Over 2 Inches)
Accidents happen—whether it’s from a doorknob that swung too wide, furniture that scraped too hard, or an unexpected bump from roughhousing. If you’ve ended up with a large hole in your drywall (anything over 2 inches wide), don’t panic. It may look bad, but with a few tools and a little time, you can fix it and make your wall look brand new again.
Repairing a large hole takes more effort than patching a small nail hole, but it’s totally doable as a DIY project. Follow these step-by-step instructions, and you’ll be amazed at how well your wall turns out.
Step 1: Cut a Square Around the Hole
Start by cleaning up the damaged area. Use a drywall saw or a utility knife to cut a neat, square or rectangular shape around the hole. This makes it much easier to fit a patch and get a clean, finished result.
Tip: Don’t worry about making it perfectly square—it just needs to have straight, manageable edges.
Step 2: Prepare the Patch
Next, cut a new piece of drywall that matches the size of the hole you just made. The easiest way to do this is to trace the opening onto a scrap piece of drywall and then cut it to match.
If you don’t have leftover drywall, you can buy small repair pieces at most hardware stores.
Step 3: Attach Support Behind the Hole
Here’s the key to a strong patch: you need something to screw the drywall into. Cut a small wooden board (like a 1×2) a few inches longer than the width of the hole. Slide it inside the opening and screw it into the existing wall above and below the hole so it acts as a brace or backing strip.
This gives the new drywall something solid to attach to.
Step 4: Insert the Patch
Now take the drywall patch you cut earlier and place it into the hole. Screw it into the wooden backing using drywall screws. Make sure the surface is flush with the existing wall.
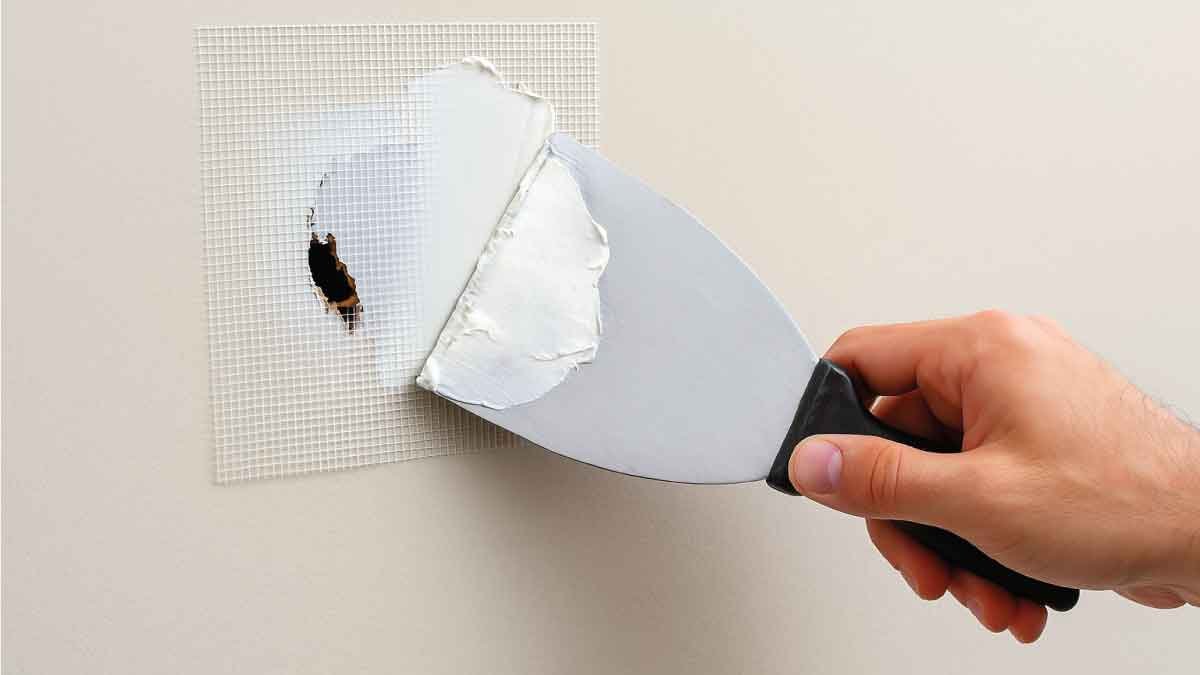
Step 5: Tape the Seams
To create a seamless look, use drywall tape or mesh tape to cover all the edges of the patch. This helps prevent cracking and gives you a smooth transition between the old wall and the new patch.
Step 6: Apply Drywall Mud
Using a putty knife, apply a layer of joint compound (drywall mud) over the tape and around the edges. Smooth it out as best you can, feathering the edges so it blends into the surrounding wall.
Let it dry completely—this can take several hours or overnight.
Step 7: Sand and Repeat
Once the first layer is dry, sand it with fine-grit sandpaper until it’s smooth. If needed, apply a second (and even third) coat of mud to fill in any dips or lines, sanding between each coat for a clean, even surface.
Step 8: Prime and Paint
After your final sanding, apply a coat of primer over the patched area. Then paint to match the rest of your wall. Feather the edges of the paint so the patch blends seamlessly into the surrounding surface.
Final Thoughts
Repairing a large hole in drywall may take a bit of time and patience, but it’s absolutely something you can do yourself. This is one of the most effective and professional-looking ways to fix a drywall hole—and once you’ve done it once, you’ll feel much more confident handling future wall repairs on your own.
DIY Drywall Repair Tips
Here are some general DIY drywall repair tips to keep in mind:
- Don’t rush the drying process.
- Always use a clean putty knife.
- Use a sanding block for better control.
- Practice on a scrap piece of drywall.
- Watch for shrinkage cracks and reapply mud if needed.
These tips will help you avoid common drywall repair mistakes, like uneven finishes or visible lines.
How Long Does Drywall Patch Take to Dry?
The drying time for drywall mud depends on:
- Thickness of the layer
- Humidity and temperature in the room
On average, a coat of joint compound takes 24 hours to dry. Using fast-drying compounds can reduce this to 1-2 hours. Always check the product label.
So, how long does drywall patch take to dry? Generally, 24 hours per layer is a safe rule.
Common Drywall Repair Mistakes
Avoid these errors:
- Skipping the primer before painting
- Using too much mud at once
- Not sanding between layers
- Patching too large a hole without support
Being aware of common drywall repair mistakes helps ensure a professional-looking result.
How to Cover a Hole in the Wall Without Drywall
In a pinch, you can cover holes using:
- Wall decals or posters
- Peel-and-stick wall panels
- Fabric or canvas wall art
These are not permanent solutions but work as a temporary fix. Still, knowing how to cover a hole in the wall can buy you time until a proper repair is done.
How to Patch Drywall Like a Pro
Want professional-looking results? Here are some tips on how to patch drywall like a pro:
- Use mesh tape for stronger repairs.
- Feather mud edges widely.
- Apply multiple thin coats.
- Use a work light to spot imperfections.
- Take your time.
Following these tips can help you achieve a smooth, invisible finish that rivals professional repairs.
Final Thoughts
Learning how to patch a hole in drywall empowers you to handle one of the most common home maintenance tasks. Whether you’re dealing with a tiny nail hole or a bigger accident, you now have the tools and techniques to fix it efficiently.
From using a drywall patch kit to understanding how long drywall patches take to dry, this guide has you covered. With practice and patience, you can master drywall repair and keep your walls looking perfect.
So go ahead, grab your tools, and tackle that hole in the wall. Your future self (and your walls) will thank you.
FAQs:
What is the easiest way to patch a small hole in drywall?
The easiest way is to clean the hole, apply some spackling paste with a putty knife, let it dry, sand it smooth, and then paint over it. For tiny nail holes, you can even use pre-mixed spackle. It’s a quick fix and perfect for beginners.
Can I use toothpaste to fix a hole in the wall?
Yes, but only for very tiny holes and as a temporary solution. Toothpaste can dry and fill small gaps, but it’s not durable and may crack or crumble over time. It’s better to use drywall compound or a patch kit for long-lasting results.
How do you fix a drywall hole without using a patch kit?
You can fix it using a scrap piece of drywall, some joint compound, drywall tape, and a few basic tools. Cut out the damaged area, insert the new drywall piece, tape the seams, apply mud in layers, and then sand and paint. It’s a bit more work, but doable without a kit.
Should I use mesh tape or paper tape for drywall repair?
Mesh tape is easier for beginners and sticks directly to the wall, making it ideal for patching holes. Paper tape gives a stronger finish but needs joint compound underneath to stay in place. For most small repairs, mesh tape is faster and more user-friendly.
Why does my drywall patch still show after painting?
This usually happens when the patch wasn’t sanded smoothly or wasn’t primed before painting. Skipping primer causes the paint to absorb unevenly, making the patch visible. Always sand the area flush with the wall, apply a good primer, and then paint for a seamless finish.