
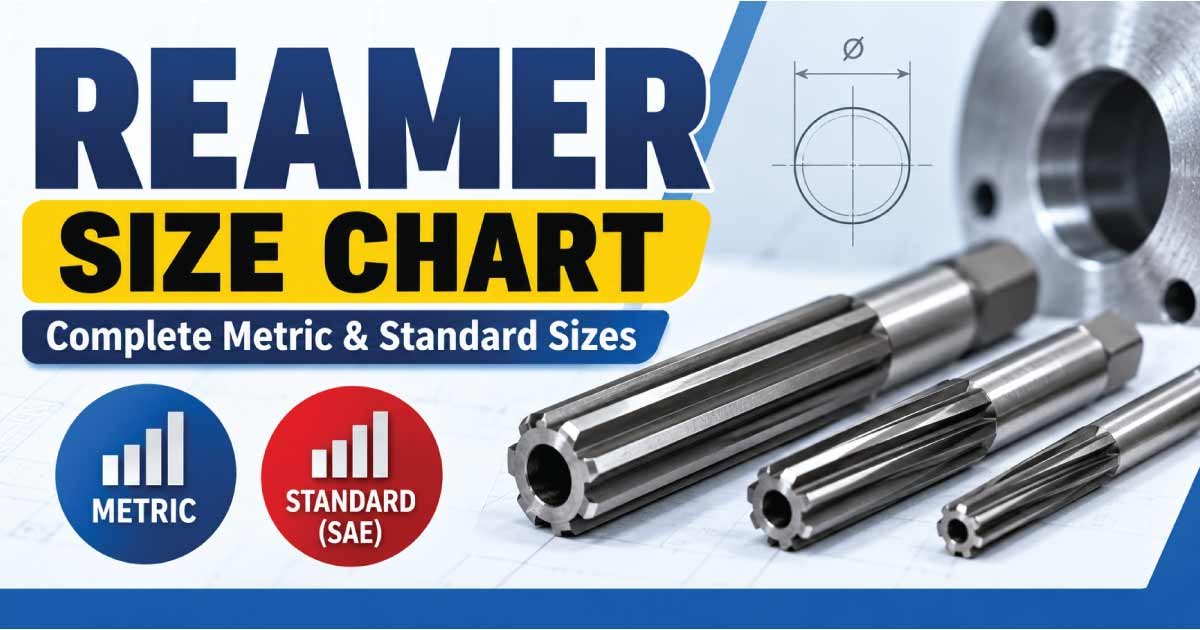
A reamer size chart helps machinists, fabricators, mechanics, and DIY users select the correct tool for producing a precise finished hole. Unlike a drill bit, a reamer is normally used after drilling or boring to improve hole size, roundness, alignment, and surface finish.
Reamers are available in metric, fractional-inch, decimal-inch, and other specialized sizes. The correct choice depends not only on the reamer diameter but also on the required hole tolerance, workpiece material, reamer type, and amount of material left for reaming.
This guide covers metric reamer sizes, standard and fractional reamer sizes, decimal equivalents, common reamer types, hole preparation, tolerances, selection tips, and common mistakes.
What Is a Reamer?
A reamer is a multi-edge cutting tool designed to accurately enlarge and finish an existing hole. It removes a relatively small amount of material compared with a drill and is intended to produce a more accurate and smoother hole.
A reamer may be used manually with a tap wrench or similar holder, or mechanically in equipment such as a drill press, milling machine, or machining center, depending on the reamer design and application.
The cutting diameter is the most important dimension when selecting a reamer, but it is not the only specification that matters.
Typical reamer specifications can include:
- Cutting diameter
- Overall length
- Cutting length
- Shank diameter
- Flute design
- Material
- Coating
- Tolerance
- Cutting direction
- Blind-hole or through-hole suitability
For example, Guhring lists reamers in precise metric diameters and also offers intermediate dimensions rather than limiting users to whole-millimeter sizes.
Metric Reamer Size Chart
Metric reamers are identified by their nominal diameter in millimeters. Common sizes are available in small increments, while precision tooling manufacturers may provide additional intermediate diameters for specific applications.
The following chart shows common nominal metric reamer sizes. It is intended as a practical reference rather than a complete manufacturer catalog.
| Metric Size (mm) | Metric Size (mm) | Metric Size (mm) | Metric Size (mm) |
|---|---|---|---|
| 1.0 | 2.0 | 3.0 | 4.0 |
| 5.0 | 6.0 | 7.0 | 8.0 |
| 9.0 | 10.0 | 11.0 | 12.0 |
| 13.0 | 14.0 | 15.0 | 16.0 |
| 17.0 | 18.0 | 19.0 | 20.0 |
| 21.0 | 22.0 | 23.0 | 24.0 |
| 25.0 | 26.0 | 27.0 | 28.0 |
| 29.0 | 30.0 | 32.0 | 35.0 |
| 40.0 | 45.0 | 50.0 | — |
These nominal sizes should not be interpreted as a guarantee that every manufacturer stocks every diameter. Tool catalogs often include particular diameter ranges and intermediate sizes.
For example, Guhring’s HR 500 reamer range includes metric sizes and intermediate diameters, demonstrating why the manufacturer’s catalog should be checked when a hole requires a specific finished diameter.
Common Metric Reamer Sizes
Some particularly common metric sizes include:
- 3 mm
- 4 mm
- 5 mm
- 6 mm
- 8 mm
- 10 mm
- 12 mm
- 15 mm
- 16 mm
- 20 mm
- 25 mm
A 10 mm reamer, for example, is a nominal 10.000 mm tool in one common precision configuration, but the finished hole specification may require a tolerance rather than simply “10 mm.” Guhring lists a 10 mm H7 reamer as one example of a tolerance-specific tool.
Standard, Fractional, and Decimal Reamer Sizes
In inch-based machining, reamers may be identified using fractional sizes, decimal sizes, letter sizes, or number sizes.
Fractional reamers are expressed as fractions of an inch, such as 1/4, 3/8, or 1/2 inch. Decimal reamers are identified by their actual nominal decimal diameter.
Common Fractional Reamer Sizes
| Fractional Size | Decimal Equivalent (in) | Approx. Metric (mm) |
|---|---|---|
| 1/8″ | 0.1250″ | 3.175 |
| 3/16″ | 0.1875″ | 4.763 |
| 1/4″ | 0.2500″ | 6.350 |
| 5/16″ | 0.3125″ | 7.938 |
| 3/8″ | 0.3750″ | 9.525 |
| 7/16″ | 0.4375″ | 11.113 |
| 1/2″ | 0.5000″ | 12.700 |
| 9/16″ | 0.5625″ | 14.288 |
| 5/8″ | 0.6250″ | 15.875 |
| 11/16″ | 0.6875″ | 17.463 |
| 3/4″ | 0.7500″ | 19.050 |
| 7/8″ | 0.8750″ | 22.225 |
| 1″ | 1.0000″ | 25.400 |
The metric values are mathematical conversions of the nominal inch sizes. They do not mean that a fractional reamer and a metric reamer with a similar nominal diameter are interchangeable.
For precision work, always select the tool according to the required finished-hole specification rather than choosing the closest-looking size.
Decimal Reamer Size Chart
Decimal reamers are useful when the required hole does not correspond conveniently to a fractional size.
| Decimal Size (in) | Approx. Metric (mm) | Common Use |
|---|---|---|
| 0.125″ | 3.175 | Small holes |
| 0.156″ | 3.969 | Small precision work |
| 0.187″ | 4.750 | General machining |
| 0.250″ | 6.350 | General-purpose holes |
| 0.3125″ | 7.938 | General machining |
| 0.375″ | 9.525 | Machine components |
| 0.4375″ | 11.113 | General machining |
| 0.500″ | 12.700 | Bushings and fittings |
| 0.5625″ | 14.288 | Component holes |
| 0.625″ | 15.875 | Larger machine holes |
| 0.750″ | 19.050 | Bushings and mechanical parts |
| 0.875″ | 22.225 | Larger precision holes |
| 1.000″ | 25.400 | Large machine holes |
This is a reference conversion chart, not a complete commercial reamer inventory. Manufacturers can offer many additional decimal sizes and special diameters.
Metric vs Standard Reamer Sizes
The biggest difference between metric and standard reamers is the measurement system used to identify the tool.
| Feature | Metric Reamer | Standard/Inch Reamer |
|---|---|---|
| Primary unit | Millimeter | Inch |
| Example | 10.0 mm | 0.375 in |
| Common identification | Nominal metric diameter | Fractional, decimal, letter, or number size |
| Conversion needed | Usually no | Often when working with metric drawings |
| Typical applications | Metric components | Inch-based components |
| Selection priority | Finished diameter and tolerance | Finished diameter and tolerance |
A metric and inch reamer can have very similar diameters without being equivalent.
For example, a 10 mm reamer is approximately 0.3937 inch, so it is not the same as a 3/8-inch reamer, which is 0.375 inch.
Likewise, a 1/2-inch reamer is 12.7 mm, so it should not automatically be substituted for a 12 mm metric reamer.
How Reamer Size Is Measured
The cutting diameter is generally the key dimension used to identify a reamer. However, precision applications require more than simply measuring the tool with a basic ruler or caliper.
A reamer’s important dimensions may include:
- Cutting diameter: The diameter of the cutting portion.
- Shank diameter: The diameter held by the chuck or tool holder.
- Overall length: Total tool length.
- Cutting length: Length occupied by the cutting edges.
- Chamfer or lead: The tapered cutting portion that enters the hole.
- Flute length: The portion containing the cutting flutes.
For precision inspection, use appropriate measuring equipment such as a micrometer, gauge, or other suitable inspection method.
Do not assume that measuring the shank tells you the cutting diameter. These are separate dimensions.
Understanding Reamer Tolerances
One of the most important points in reamer selection is that nominal diameter and finished-hole tolerance are not the same thing.
A reamer marked 10 mm does not by itself tell you the complete allowable finished-hole tolerance. The required tolerance depends on the application and the specific tool design.
Precision reamers can be manufactured for particular tolerance classes. Guhring, for example, lists H7 reamer configurations and identifies H7 tooling as being associated with DIN 1420.
Why Tolerance Matters
Consider a drawing that specifies a hole as a particular diameter with a narrow tolerance band. Simply choosing a tool whose nominal diameter looks correct may not produce the required result.
Factors affecting the final hole include:
- Reamer diameter tolerance
- Existing hole size
- Workpiece material
- Machine condition
- Tool alignment
- Cutting speed
- Feed rate
- Lubrication or coolant
- Tool wear
- Hole geometry
For critical applications, follow the engineering drawing and the reamer manufacturer’s specifications rather than relying solely on a general size chart.
Types of Reamers and Their Sizes
Different reamer designs are intended for different applications. The diameter may be similar, but the construction and use can differ significantly.
Hand Reamers
Hand reamers are designed for manual operation. They commonly have a square drive at the end of the shank for use with a suitable wrench.
They are useful for:
- Repair work
- Fitting holes manually
- Maintenance operations
- Low-volume work
- Situations where machine reaming is impractical
Hand reamers generally have a longer lead than machine reamers, making it easier to start the tool into an existing hole.
Machine Reamers
Machine reamers are designed for use with machine tools.
They can be used in:
- Drill presses
- Milling machines
- Lathes
- Machining centers
- Other suitable machine-tool setups
Rigid alignment is particularly important because forcing a reamer sideways can affect hole accuracy and tool life.
Adjustable Reamers
Adjustable reamers allow the effective cutting diameter to be changed within a specified range.
They can be useful when:
- A precise intermediate size is needed.
- A single tool must cover multiple nearby dimensions.
- Maintenance work requires fitting a hole accurately.
However, the adjustment range is limited, and the tool should be set according to the manufacturer’s instructions.
Taper Reamers
Taper reamers produce tapered holes rather than cylindrical holes.
They are used for applications involving tapered components, pins, sockets, and similar parts.
A taper reamer should not be confused with a standard straight reamer. The required taper must match the mating component or specified standard.
Also Read:
How to Choose the Correct Reamer Size
Choosing a reamer should start with the finished-hole requirement, not the tool drawer.
1. Check the Engineering Drawing
Identify:
- Nominal hole diameter
- Upper and lower limits
- Tolerance class
- Hole depth
- Whether the hole is blind or through
- Required surface finish
- Material being machined
2. Determine the Existing Hole
A reamer is normally not intended to create a full-size hole from solid material.
First establish the drilled or bored hole diameter. The remaining material must be appropriate for the selected reamer and application.
3. Select the Reamer Diameter
Choose a reamer that matches the required finished-hole specification.
Do not simply choose the nearest available tool.
4. Check the Reamer Type
Consider whether you need:
- Hand reamer
- Machine reamer
- Straight-flute reamer
- Spiral-flute reamer
- Adjustable reamer
- Taper reamer
- Carbide reamer
- HSS or HSS-E reamer
5. Confirm Machine Compatibility
Check:
- Shank diameter
- Tool-holder capacity
- Machine rigidity
- Maximum spindle speed
- Coolant requirements
- Workholding
Precision reamers may have specific holding requirements. Some modern tooling is designed for hydraulic or shrink-fit holders, for example.
Also Read:
How Much Material Should Be Left for Reaming?
A common machining mistake is treating reaming like drilling.
The drilled hole should generally be undersize relative to the finished hole, leaving a controlled amount of material for the reamer to remove.
The exact allowance depends on factors such as:
- Hole diameter
- Workpiece material
- Reamer design
- Hole depth
- Machine setup
- Required tolerance
- Manufacturer recommendations
There is no single allowance that is correct for every diameter and material.
Too little stock can prevent the reamer from cutting effectively. Too much stock can overload the cutting edges, increase torque, produce poor finish, and potentially damage the tool.
For production work, use the tooling manufacturer’s recommended drilling and reaming conditions.
Reaming vs Drilling
Drills and reamers perform different jobs.
| Characteristic | Drill | Reamer |
|---|---|---|
| Main purpose | Create a hole | Finish an existing hole |
| Material removal | Relatively high | Relatively low |
| Typical accuracy | Lower than precision reaming | Higher when correctly applied |
| Hole finishing | Basic | Improved |
| Starting from solid | Yes | Generally no |
| Tool geometry | Designed for penetration | Designed for controlled finishing |
A common workflow is:
Center or locate → Drill → Bore if necessary → Ream → Inspect
The exact sequence depends on the required accuracy and machining process.
Also Read:
Common Reamer Size Mistakes
Selecting the correct diameter is only part of successful reaming. Several mistakes can reduce hole quality.
Using a Reamer Like a Drill
A reamer should not normally be used to make a complete hole from solid material. Its purpose is finishing and controlled enlargement.
Choosing the Closest Size
A 10 mm hole does not necessarily mean that any tool near 10 mm is acceptable. The drawing tolerance determines the actual requirement.
Ignoring the Existing Hole
The starting hole directly affects the amount of material the reamer must remove.
Forcing the Tool
Excessive force can damage cutting edges or produce an inaccurate hole.
Poor Alignment
A reamer should enter the existing hole correctly. Misalignment can lead to poor geometry and uneven cutting.
Ignoring Tool Wear
A worn reamer may no longer produce the expected hole size or finish.
Using the Wrong Reamer Type
A hand reamer, machine reamer, taper reamer, and precision production reamer are not interchangeable simply because their nominal diameters are similar.
Tips for Accurate Reaming
For consistent results, pay attention to the complete machining process rather than the reamer alone.
- Drill the starting hole accurately.
- Keep the workpiece securely clamped.
- Use appropriate cutting fluid or coolant for the material and tool.
- Maintain proper alignment.
- Follow the manufacturer’s recommended speed and feed.
- Avoid excessive radial pressure.
- Inspect the finished hole rather than assuming the tool produced the target size.
- Replace or recondition worn tooling when accuracy begins to deteriorate.
- Keep reamers clean and protected from damage during storage.
- Match the tool holder to the shank and machine setup.
For high-precision work, manufacturer’s data should take priority over generic machining charts.
Reamer Size Conversion: Inch to Metric
Converting between inches and millimeters is straightforward:
1 inch = 25.4 mm
To convert inches to millimeters:
Inches × 25.4 = millimeters
To convert millimeters to inches:
Millimeters ÷ 25.4 = inches
For example:
0.500 × 25.4 = 12.7 mm
Therefore, a nominal 1/2-inch reamer corresponds mathematically to 12.7 mm.
However, mathematical equivalence does not automatically make two tools interchangeable in precision machining. The actual finished-hole requirement and tolerance must always be considered.
Common Reamer Applications
Reamers are widely used when a drilled or bored hole requires improved dimensional accuracy or surface quality.
Common applications include:
- Bushings and bearing seats
- Dowel-pin holes
- Machine components
- Automotive components
- Fabrication and repair work
- Tool and die work
- Jigs and fixtures
- Hydraulic components
- Aerospace machining
- General engineering
The correct reamer depends on the material, hole geometry, production volume, and required tolerance.
Frequently Asked Questions
What is the most common reamer size?
There is no single universal most-common reamer size. Popular sizes depend on the industry, machine type, and measurement system being used. Metric shops may frequently use sizes such as 5, 6, 8, 10, 12, and 20 mm, while inch-based shops may use common fractional or decimal sizes.
Can I use a metric reamer for an inch hole?
Only when the actual diameter and required tolerance make it suitable. A close nominal conversion is not enough for precision work.
Is a reamer bigger than the drill bit?
Normally, yes. The starting hole is made smaller than the final reamed hole so the reamer has a controlled amount of material to remove.
Can a reamer make a hole from solid material?
A conventional reamer is generally intended to finish an existing hole rather than drill a new hole from solid material.
What is an H7 reamer?
An H7 reamer is a reamer configuration intended to produce a hole associated with an H7 tolerance specification. The actual result depends on the tool, material, machine, starting hole, and process conditions. Manufacturer documentation should be followed for critical applications. Guhring, for example, lists H7 reamers in its product range.
Should I use a hand or machine reamer?
Use a hand reamer when manual finishing is appropriate. Use a machine reamer when the operation is performed on a suitable machine tool and controlled alignment and feed are required.
What is the difference between a reamer and a boring tool?
A boring tool enlarges an existing hole and can provide substantial control over diameter and geometry. A reamer is primarily a finishing tool designed to remove a relatively small amount of material and produce a consistent finished hole.
Final Reamer Size Selection Guide
A reamer size chart is useful for quickly identifying nominal metric, fractional, and decimal sizes, but precision machining requires more than matching numbers.
Before selecting a reamer, confirm the finished hole diameter, tolerance, starting-hole size, material, hole depth, reamer type, and machine setup.
For general work, common metric and fractional sizes provide a convenient starting point. For close-tolerance applications, use the exact tool specification supplied by the manufacturer. Modern reamer ranges can include intermediate diameters and application-specific tolerance classes, so a general chart should never replace the manufacturer’s technical documentation.
The most important rule is simple: select the reamer based on the required finished hole, not merely the closest nominal size. Proper hole preparation, alignment, cutting conditions, inspection, and tool selection are what turn a reamer into a precision finishing tool.