
Measuring a CNC drill bit diameter correctly is one of the most important skills in machining and manufacturing. Whether you are working in a workshop, setting up a CNC machine, or verifying tool wear, accurate measurement ensures precision drilling, correct tool selection, and high-quality results.
Even a small error in drill bit diameter measurement can lead to poor hole accuracy, loose fits, broken tools, or rejected parts. That is why machinists always verify drill sizes before use.
In this guide, you will learn step-by-step methods to measure CNC drill bit diameter, tools used for measurement, common mistakes, and professional tips used in CNC workshops.
Table of Contents
ToggleWhat Is a CNC Drill Bit Diameter?
The CNC drill bit diameter is the precise measurement of the cutting width of a drill tool, taken from one outer cutting edge to the opposite edge. This value defines how large a hole the drill will create in the material during machining operations.
This diameter determines:
- Hole size produced in material
- Fit accuracy for screws, bolts, and pins
- Compatibility with CNC programs
- Tool selection for machining operations
CNC drill bits are manufactured in both metric and imperial standard sizes, but slight variations may exist due to tool wear, protective coatings, and manufacturing tolerances. These small differences can affect machining accuracy in precision engineering tasks.
Why Measuring Drill Bit Diameter Is Important
In CNC machining, precision is extremely critical because even the smallest deviation can impact product quality and assembly performance. A difference as small as 0.05 mm can lead to incorrect fits, machining errors, or part rejection in industrial applications.
Key reasons to measure drill bit diameter:
- Ensures correct hole size in CNC programming
- Prevents loose or tight fits in assemblies
- Detects tool wear before failure
- Improves machining accuracy
- Avoids scrap material and rework
A worn or damaged drill bit often produces oversized, undersized, or rough holes, which can cause serious production issues, reduce efficiency, and increase manufacturing costs significantly.
Tools You Need to Measure CNC Drill Bit Diameter
Before measuring a CNC drill bit, it is essential to use proper precision instruments. The accuracy of your measurement depends heavily on the quality and type of tool used. Selecting the correct measuring device ensures reliable results and avoids machining errors.
Common tools include:
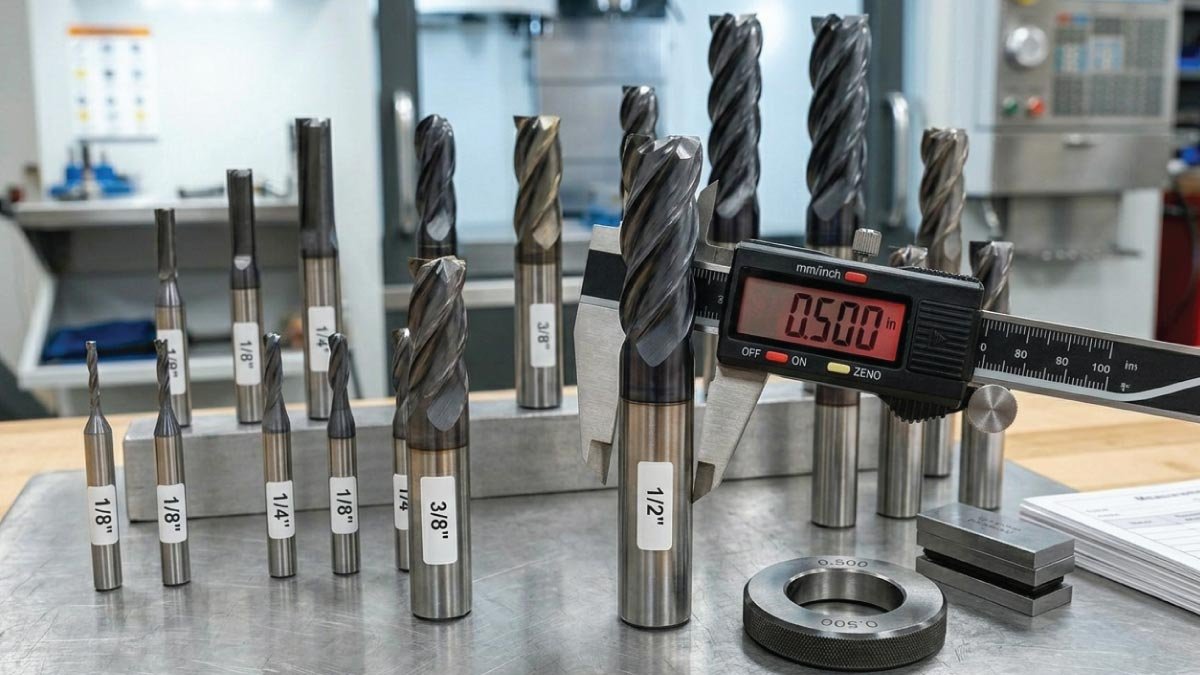
1. Digital Caliper
A digital caliper is the most commonly used measuring tool in CNC workshops. It provides quick, easy, and reasonably accurate readings, making it suitable for general-purpose drill bit measurement.
- Accuracy: ±0.01 mm
- Easy to use
- Suitable for most drill sizes
2. Micrometer
A micrometer is a high-precision measuring instrument used when extremely accurate measurements are required. It is especially useful for small drill bits where even tiny deviations matter.
- Accuracy: ±0.001 mm
- Best for small diameters
- More precise than calipers
3. Drill Gauge
A drill gauge is a specialized tool designed for quickly identifying drill bit sizes. It is commonly used in workshops for fast reference rather than precise measurement.
- Fast identification
- Good for standard bits
- Less precise than micrometer
4. Optical Comparator (Advanced)
An optical comparator is an advanced industrial measurement device used in professional quality control environments. It provides extremely accurate measurements by projecting the drill profile onto a screen.
- Very high accuracy
- Used in quality control labs
Step-by-Step: How to Measure CNC Drill Bit Diameter
Now let’s go through the correct professional process used by machinists in CNC workshops and manufacturing environments. Following these steps ensures accurate measurement, reduces errors, and helps identify tool wear before it affects machining quality or production efficiency.
Step 1: Clean the Drill Bit
Before starting any measurement, it is extremely important to properly clean the drill bit. Any contamination on the tool surface can directly affect the accuracy of your reading and lead to incorrect diameter estimation.
Dust, oil, coolant residue, or metal chips can create small gaps or false contact points during measurement.
- Wipe with clean cloth
- Remove cutting debris
- Ensure dry surface
👉 A clean tool gives more accurate measurement results and ensures reliable CNC setup decisions.
Step 2: Identify the Cutting Area
The correct diameter must always be measured at the cutting portion of the drill bit, not the shank. Many beginners make the mistake of measuring the wrong section, which leads to incorrect tool sizing and machining errors.
A drill bit consists of two main parts:
- Shank (non-cutting part)
- Cutting flutes (working part)
👉 Always measure the cutting diameter, not the shank diameter unless specifically required for tool fitting or holder compatibility.
Step 3: Use a Digital Caliper for Basic Measurement
A digital caliper is the most commonly used tool in CNC workshops for quick and practical measurement of drill bit diameter. It provides fast readings and is suitable for most general machining tasks.
How to do it:
- Turn on the digital caliper
- Open jaws fully
- Place drill bit between jaws
- Align cutting edges properly
- Gently close jaws until they touch both edges
- Read the value on the display
👉 Ensure the caliper is perfectly perpendicular to the drill bit to avoid angled measurement errors and inaccurate readings.
This method is ideal for medium and large drill bits used in general CNC operations.
Step 4: Measure with a Micrometer for Precision
For small drill bits or high-precision machining work, a micrometer is the preferred tool. It provides much higher accuracy compared to calipers and is widely used in professional industries where tight tolerances are required.
Steps:
- Place drill bit between spindle and anvil
- Rotate thimble gently
- Apply light pressure using ratchet stop
- Read measurement scale
👉 Do not over-tighten, as excessive pressure can compress the drill bit slightly and result in false or inaccurate readings.
Micrometers are commonly used in aerospace, automotive, and precision engineering industries where accuracy is critical.
Step 5: Measure at Multiple Points
Drill bits do not always wear evenly, especially when used in hard materials or high-speed operations. That is why taking only one measurement is not sufficient for accurate evaluation.
Check diameter at:
- Top cutting edge
- Middle section
- Near tip
👉 If measurements vary, it indicates that the tool is worn, damaged, or no longer suitable for precision machining.
This step is very important for early detection of tool wear and helps prevent machining defects and production errors.
Step 6: Compare with Standard Size Chart
After measuring the drill bit, the next step is to compare your results with standard CNC drill bit size charts. This helps verify whether the tool is within acceptable manufacturing tolerance or has worn beyond usable limits.
Common sizes include:
- 1 mm
- 2 mm
- 3 mm
- 6 mm
- 10 mm
- 1/8″ (3.175 mm)
- 1/4″ (6.35 mm)
👉 Small deviations are normal due to manufacturing tolerance, but large differences usually indicate tool wear, damage, or incorrect tool selection.
Step 7: Check Tool Wear Condition
Measuring drill bit diameter is not only about size verification—it also helps evaluate tool health and performance condition. Worn drill bits can negatively affect machining quality and increase production costs.
Signs of worn drill bits:
- Reduced diameter
- Uneven cutting edges
- Rough holes
- Excess heat during drilling
👉 Worn tools should be replaced immediately to avoid machining defects, poor surface finish, and potential damage to the workpiece or CNC machine.
Also Read:
Common Mistakes When Measuring Drill Bit Diameter
Many beginners and even intermediate CNC operators make simple but critical mistakes while measuring drill bit diameter. These errors can lead to incorrect tool selection, poor machining accuracy, and production issues. Understanding these mistakes helps improve measurement reliability and overall CNC performance.
1. Measuring the shank instead of cutting edge
One of the most frequent mistakes is measuring the shank instead of the actual cutting diameter. The shank is only used for holding the tool and does not represent the working size of the drill bit.
This mistake leads to completely wrong size results because the shank is often larger or different in shape compared to the cutting edges. Always focus on the fluted cutting area for accurate measurement.
2. Incorrect caliper angle
Another common error occurs when the digital caliper is not properly aligned with the drill bit. If the caliper is tilted or angled during measurement, it creates false readings.
Even a slight misalignment can change the displayed value and reduce measurement accuracy. The caliper must always be perfectly perpendicular to the drill bit to ensure correct diameter measurement.
3. Excess pressure on micrometer
Using a micrometer incorrectly is another major issue, especially when too much force is applied while taking measurements. Excess pressure can slightly compress the drill bit or distort the reading.
This results in inaccurate diameter values that are smaller than the actual size. Always use the ratchet stop mechanism and apply gentle, consistent pressure for precise results.
4. Measuring dirty tools
Dirt, oil, coolant, and metal chips can significantly affect measurement accuracy. Even a thin layer of debris can create spacing errors between measuring jaws and the drill surface.
This leads to inconsistent or incorrect readings. Before measuring, always clean the drill bit properly using a cloth or cleaning solvent to ensure a smooth and accurate measurement surface.
5. Measuring only once
Taking only a single measurement is a risky practice because it may not reveal tool wear or inconsistencies. Drill bits can wear unevenly over time, especially near the cutting edges.
A single reading might look correct even if part of the tool is damaged. Always measure multiple times and at different points to ensure accuracy and detect wear or deformation early.
Also Read:
Professional Tips for Accurate Measurement
Experienced machinists follow proven practices to ensure every drill bit measurement is accurate, consistent, and reliable. These small but important habits significantly reduce errors, improve machining quality, and help maintain tool life in professional CNC environments.
Tip 1: Always measure twice
One of the simplest yet most effective rules in machining is to always take at least two measurements. Repeating the process helps confirm that the reading is consistent and not affected by hand movement or positioning errors.
If both readings match, you can trust the result. If they differ, it indicates misalignment or incorrect measurement technique.
Tip 2: Use proper lighting
Good lighting plays a very important role in accurate measurement. Poor visibility can cause misalignment between the caliper or micrometer and the drill bit, leading to incorrect readings.
Proper lighting helps you clearly see edges, align tools correctly, and avoid parallax errors. Many machinists use dedicated inspection lamps for precision work.
Tip 3: Store tools properly
Proper storage of drill bits and measuring instruments is essential for maintaining accuracy and long-term usability. Exposure to moisture, dust, or impact can damage tools and affect performance.
- Avoid rust and wear
- Keep drill bits in dry cases
- Store measuring tools in protective boxes
Good storage practices ensure tools remain accurate and ready for precision machining tasks.
Tip 4: Use calibration tools
Measuring instruments must be regularly calibrated to ensure they provide correct readings over time. Even high-quality calipers and micrometers can lose accuracy due to frequent use or environmental conditions.
Calibration tools help verify and adjust measuring devices to standard reference values, ensuring consistent and trustworthy results in CNC machining operations.
Tip 5: Replace worn tools early
Do not wait until a tool completely fails before replacing it. Worn drill bits not only affect measurement accuracy but also reduce machining quality and increase production risks.
Early replacement helps maintain consistent hole quality, reduces machine load, and prevents unexpected tool breakage during operations.
Metric vs Imperial Drill Bit Measurement
CNC machining industries around the world use both metric and imperial measurement systems depending on location, machine standards, and engineering requirements. Understanding both systems is important for accurate programming and tool selection.
1- Metric system:
The metric system is widely used in most countries for CNC machining and engineering applications.
- Measured in millimeters
- Common in Europe and Asia
This system is generally easier to use because it is based on decimal units, making conversions and calculations simpler.
2- Imperial system:
The imperial system is still widely used in the United States and some industrial sectors. It measures drill sizes in inches and fractional values.
- Measured in inches
- Common in USA
This system often uses fractions (such as 1/8″, 1/4″), which can require careful conversion when working with metric-based CNC programs.
👉 Always ensure your CNC program matches the correct system to avoid errors. Mixing metric and imperial units can lead to incorrect hole sizes, tool crashes, or machining failures.
Also Read:
Why CNC Accuracy Depends on Drill Bit Measurement
CNC machining is built on precision, and drill bit measurement plays a direct role in achieving that accuracy. If the drill diameter is incorrect, even slightly, the entire machining process can produce faulty parts that do not meet design specifications or assembly requirements.
Accurate drill bit diameter ensures:
- Perfect hole sizing
- Proper fit for fasteners
- Smooth machining process
- Reduced tool wear
- High-quality finished products
When the drill size is measured correctly, the CNC machine produces consistent and reliable holes that match engineering drawings exactly. This improves assembly performance and reduces the need for rework or manual corrections.
Even a small mistake in measurement can lead to costly production failures, including rejected parts, misaligned assemblies, and wasted material. In high-precision industries like automotive, aerospace, and mechanical manufacturing, such errors can significantly increase production costs and downtime.
Final Thoughts
Measuring CNC drill bit diameter may seem like a simple task, but it is one of the most important steps in ensuring machining accuracy and quality. Proper measurement helps maintain consistency, reduces tool-related errors, and improves overall productivity in CNC operations.
When done correctly, it ensures precision, reduces errors, and improves overall productivity. It also helps machinists detect tool wear early and make better decisions during tool selection and programming.
The key is to always follow a structured process, use the right measuring tools such as calipers or micrometers, and verify readings more than once for accuracy. Consistency and attention to detail are what separate average machining results from professional-quality output.
Simple rule to remember:
👉 “Measure cutting edges carefully, not just the tool body.”
This simple principle ensures that every CNC drilling operation starts with the correct tool data, leading to better accuracy and fewer machining problems.